The mock cable knit stitch is one of those lovely knitting techniques that looks fancy but is easy to make. It gives you the texture and twist of real cables without needing a cable needle. If you love the look of cables but want to skip the extra tool, this stitch is for you.
In this post, you’ll learn what the mock cable stitch is, how it works, and how to knit it step by step. You’ll also find tips, variations, and ideas for using it in your projects. By the end, you’ll see how simple and beautiful the mock cable knitting stitch can be. Let’s get started!
What Is the Mock Cable Knit Stitch?
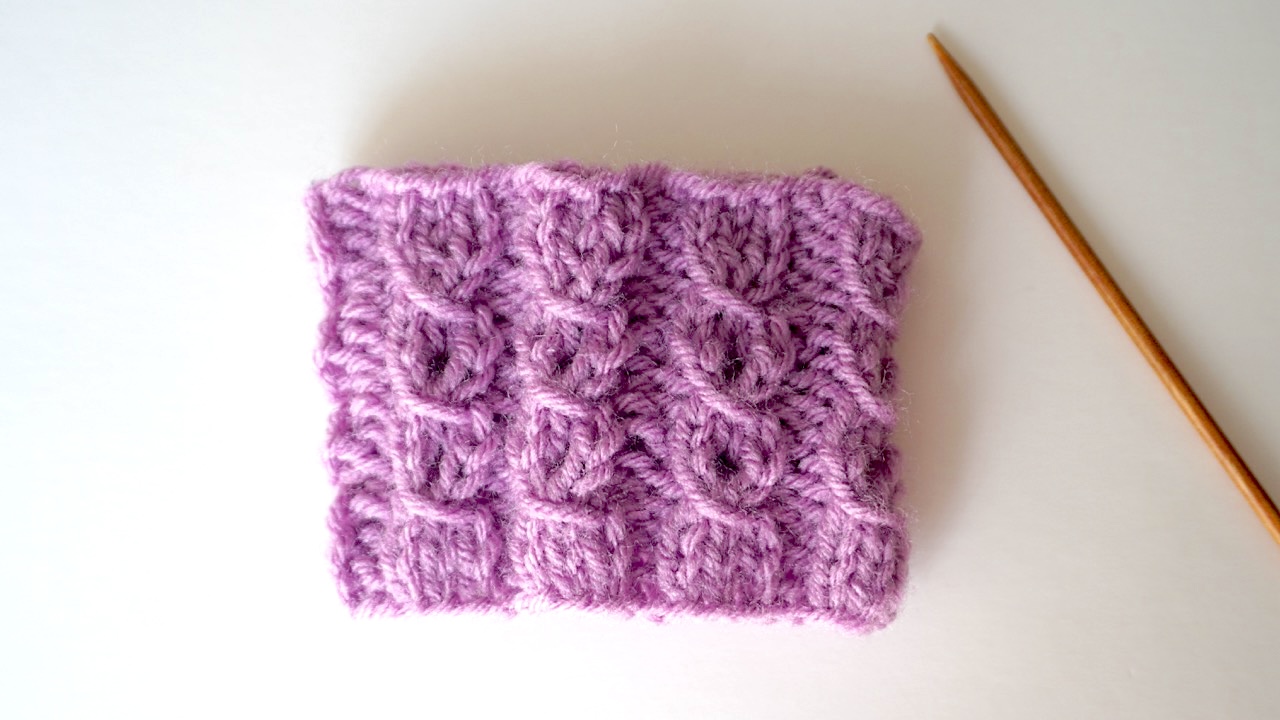
The mock cable knit stitch, also called faux cable stitch, is a textured pattern that mimics the look of twisted cables. In traditional cable knitting, you cross groups of stitches using a cable needle. The mock cable stitch, however, creates the illusion of twisted strands by slipping and lifting stitches over in a special order.
This stitch is perfect for beginners who want the style of cables without learning the full cabling technique yet. You’ll still get that elegant, rope-like texture, but you’ll spend less time fiddling with extra tools.
Because it’s worked in the round and it’s stretchy, it’s a versatile stitch for hats, sweaters, socks, and mittens. All in all, you can easily add it to any project that could use a little twisty detail.
Why Use the Mock Cable Knitting Stitch
The mock cable stitch looks complicated, but it’s easy once you learn the rhythm. Here are a few reasons knitters love this stitch:
- No cable needle needed. You only use your regular knitting needles.
- Easy to memorize. The stitch repeat is short, so it’s relaxing to knit.
- Looks complex. It adds visual interest without extra effort.
- Works with many yarns. From soft wool to cotton blends, most yarns show the twist clearly.
- Perfect for beginners. If you can knit, purl, slip, and lift over, you can make this stitch.
The mock cable knitting stitch truly is the perfect mix of beauty and simplicity. It brings a classic cable look without the challenge. You can learn it in minutes and use it for years.
Because it doesn’t need a cable needle, it’s a wonderful travel stitch too. You can knit on the go without dropping tools. It’s ideal for knitters who enjoy textured designs that are easy to follow.
Once you try it, you’ll see why so many knitters use it in their projects. The mock cable knit pattern gives your fabric texture and depth—and that elegant twist effect that never goes out of style.
How the Mock Cable Knit Stitch Works
Traditional cables rely on crossing stitches. You hold some in front or back and knit others around them. The mock cable knit stitch skips that step. Instead, it creates a similar illusion by slipping and lifting stitches over in a specific way.
The twist comes from how you slip and lift the stitches over. The result looks like a mini cable that pops out from the surface of your knitting.
There are a few popular ways to knit mock cables. Let’s look at one of the most common versions next.
Step-by-Step Instructions for the Mock Cable Knit Stitch
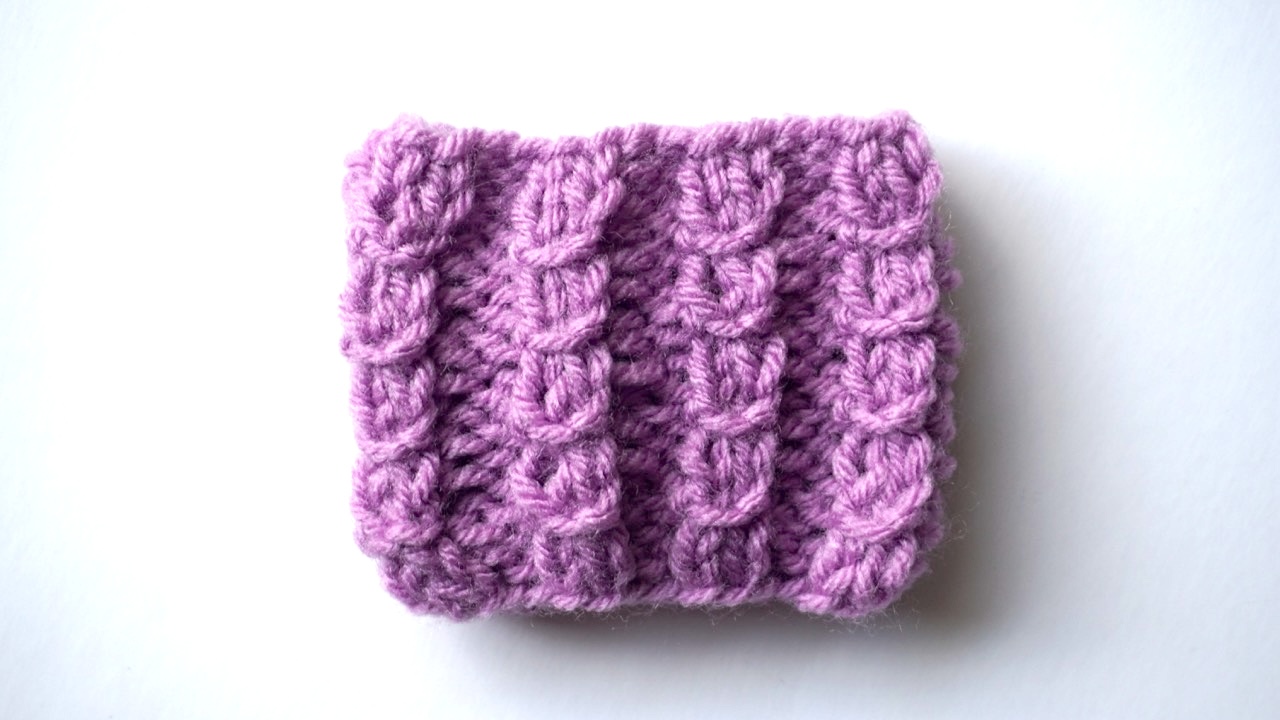
Below you’ll find an easy version of the mock cable stitch. This mock cable pattern is also called a 3-stitch mock cable and it is a repeat of four rows. The pattern works when knitting in the round.
The number of the layers between the mock cables affects the density of the pattern. Two layers between create a decorative and dense knit. If you prefer a more subdued finish, you can try three or four layers between.
- Cast on in multiples of 4.
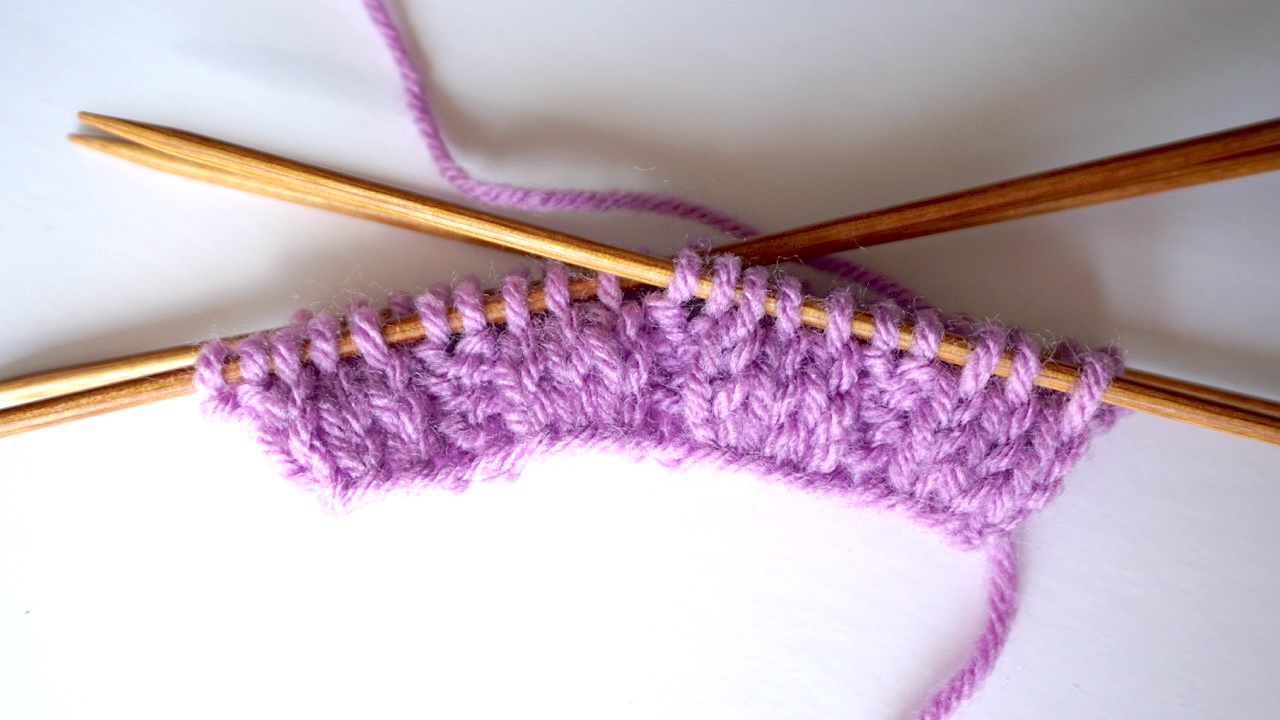
- Rib three rows of 3 knit stitches and 2 purl stitches.
- Row 1: Slip 1 stitch knitwise, knit 2 stitches, lift the slipped stitch over 2 knit stitches, and purl 2 stitches. Repeat to the end.
- Row 2: Knit 1 stitch, do a yarn round needle, knit 1 stitch, and purl 2 stitches. Repeat to the end of the row.
- Row 3: Knit 1 stitch, knit the yarn round needle, knit 1 stitch, and purl 2 stitches. Repeat to the end of the row.
- Row 4: Knit 3 stitches and purl 2 stitches. Repeat to the end of the row.
- Continue repeating these four rows until your work is the desired length.
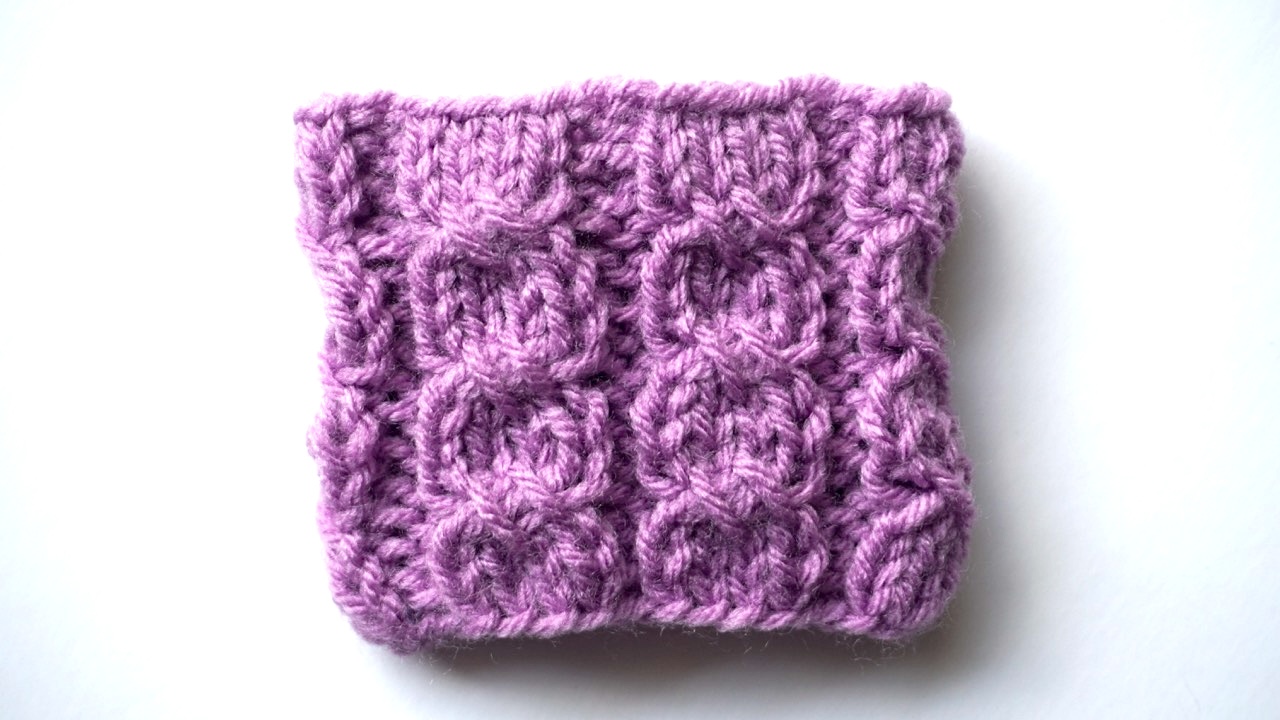
Mock Cable Stitch Pattern
Cast on a number of stitches that is divisible by five. Start by ribbing two or three rows of 3 knit stitches and 2 purl stitches. The actual mock cable will be formed on the next rows on top of the knit stitches.
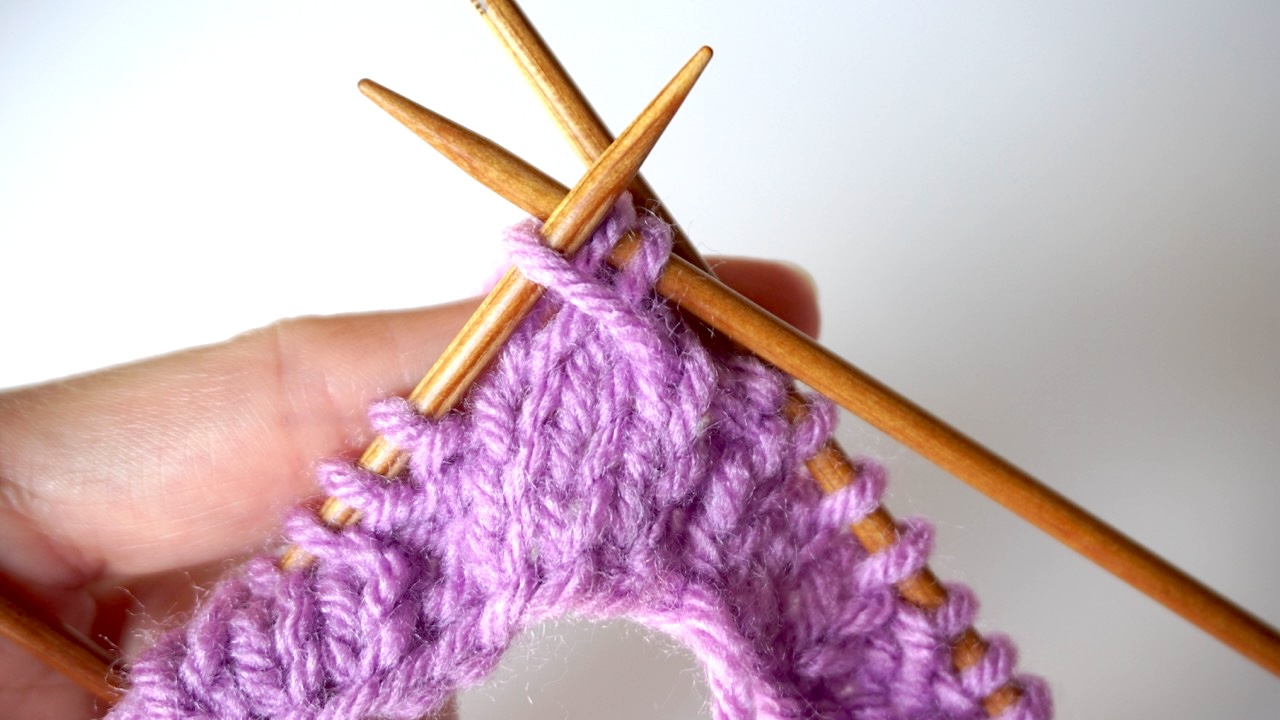
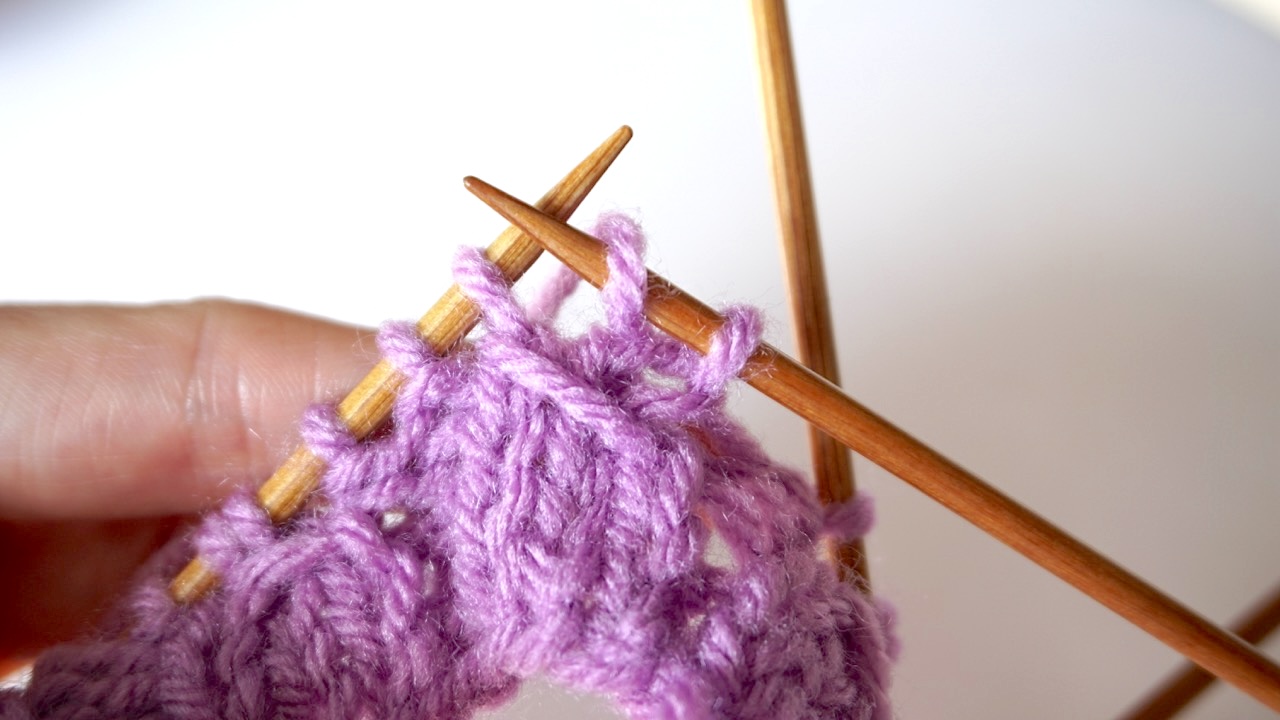
Row 1: Slip the first stitch knitwise (insert the right needle into the stitch from left to right, as if you were doing a knit stitch), knit 2 stitches, lift the stitch you slipped over the two knit stitches and off the needle, and purl 2 stitches. Repeat to end of the round.
Row 2: Knit 1 stitch, do a yarn round needle knitwise (wrap the yarn around the right needle from front to back), knit 1 stitch, and purl 2 stitches. Repeat to end of the round.
Row 3: Knit 1 stitch, knit the stitch created by the yarn round needle, knit 1 stitch, and purl 2 stitches. Repeat to end of the round.
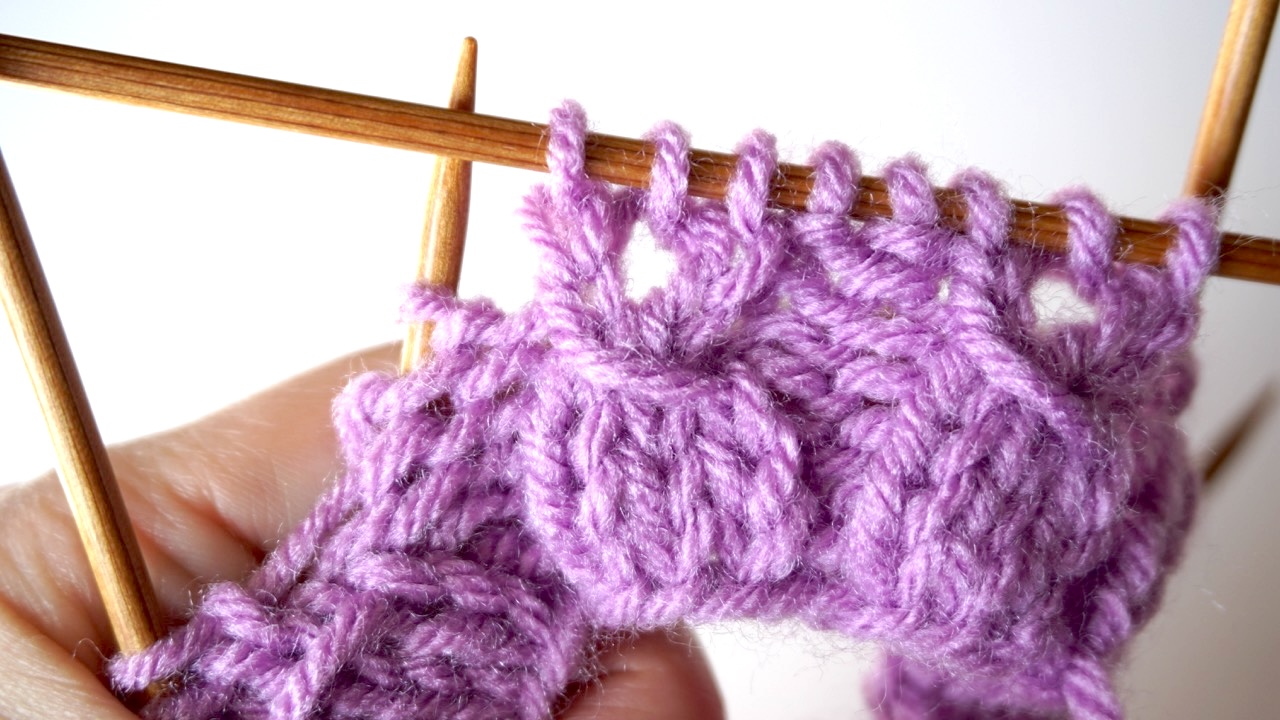
Row 4: Knit 3 stitches and purl 2 stitches. Repeat to end of the round.
Repeat rows 1–4 for the pattern until your mock cable has reached the desired length.
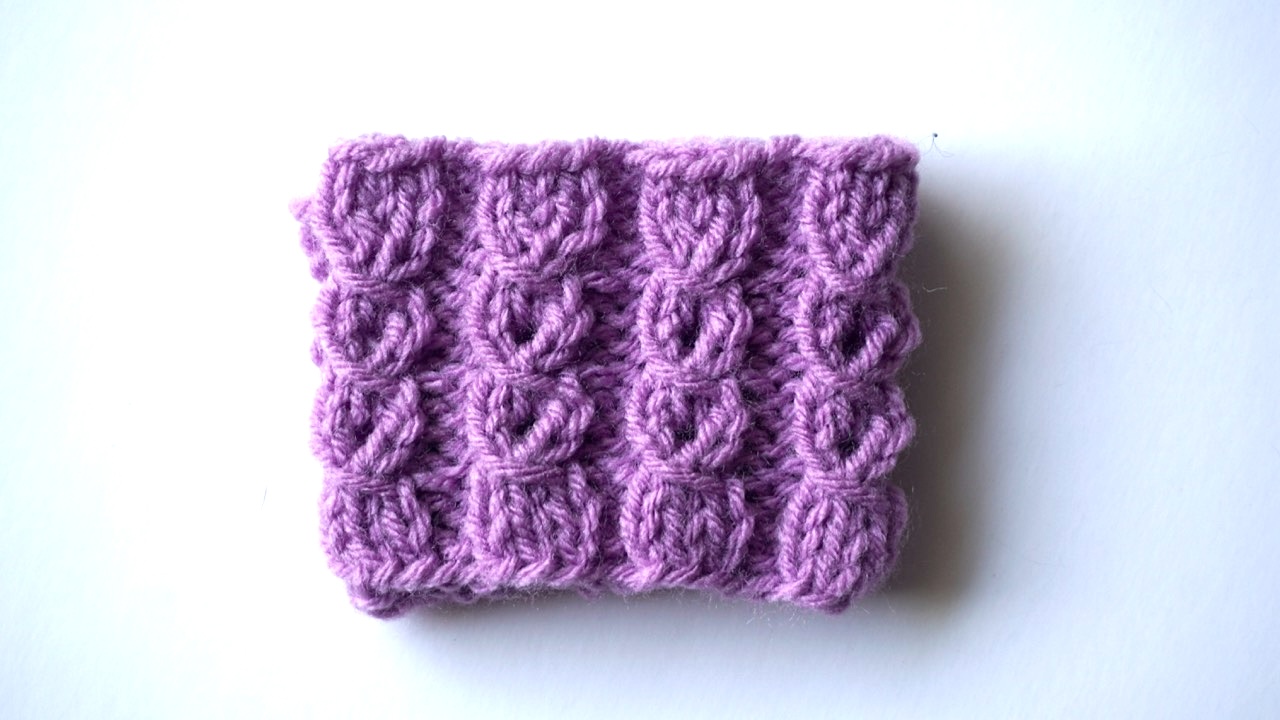
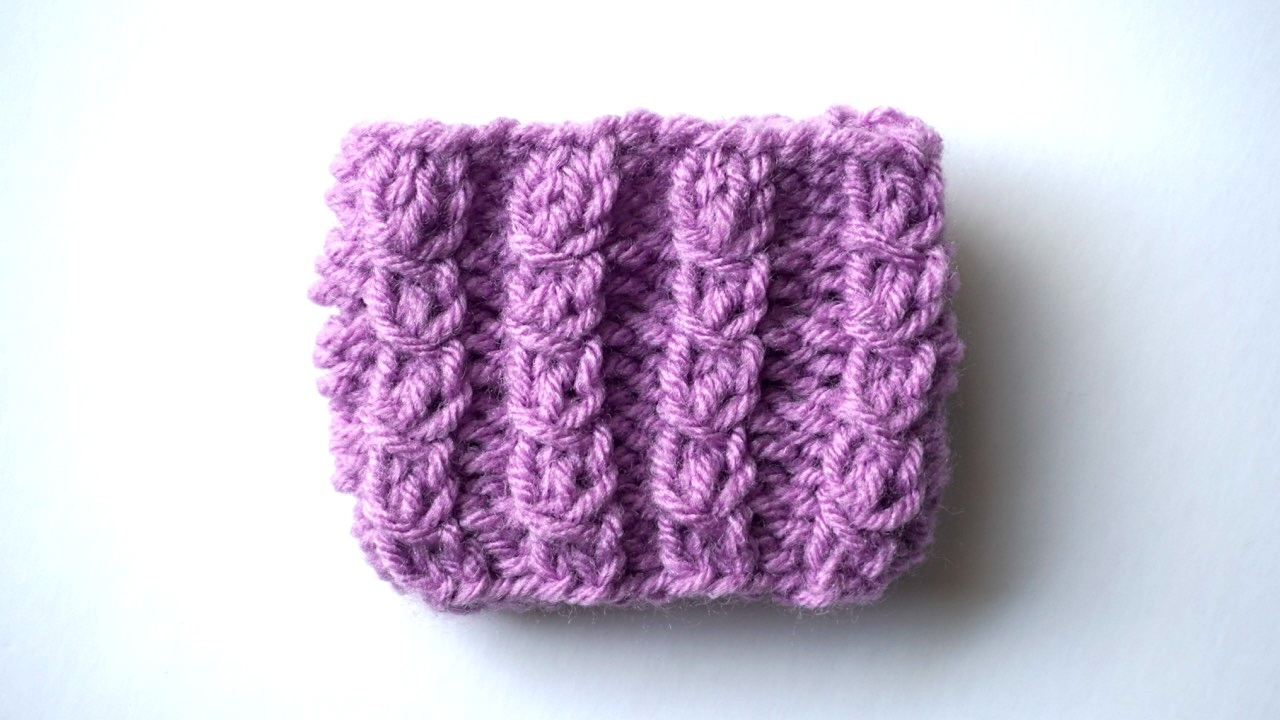
Tip! If you want to knit a mock cable without the eyelet created by the yarn round needle, knit the stitch created by the yarn round needle on the third row through the back loop.
Variations of the Mock Cable Knitting Stitch
The mock cable knitting stitch can be customized in many ways. Try one of these variations to create a unique texture.
All of these mock cable variations are quite quick to knit. The first two mock cable patterns are easier and suitable also for beginners. The third one is a bit more complex and more suitable for experienced knitters. All three mock cables are versatile and perfect for many different types of projects.
1. Simple 3-Stitch Mock Cable
Cast on a number of stitches that is divisible by four.
Start by ribbing two rows of 2 knit stitches and 2 purl stitches.
Slip the first stitch, knit the next stitch through the front loop and back loop (this way, you’ll have two stitches), pull the slipped stitch over two stitches, purl 2 stitches. Repeat to end.
Repeat these two rows until your work has reached the desired length.
2. Mock Cable With a Yarn Loop
Cast on a number of stitches that is divisible by four.
Start by ribbing two rows of 2 knit stitches and 2 purl stitches.
Pick up a loop of yarn between the 2nd and the 3rd stitch (and pass the loop around the left needle), knit 2 stitches using the loop as your working yarn, purl 2 stitches. Repeat to end.
Repeat these two rows until your work has reached the desired length.
Tip! Make the loop rather too big than too small. This way, it will be easier to knit the stitches with it—you can always tighten the loop later.
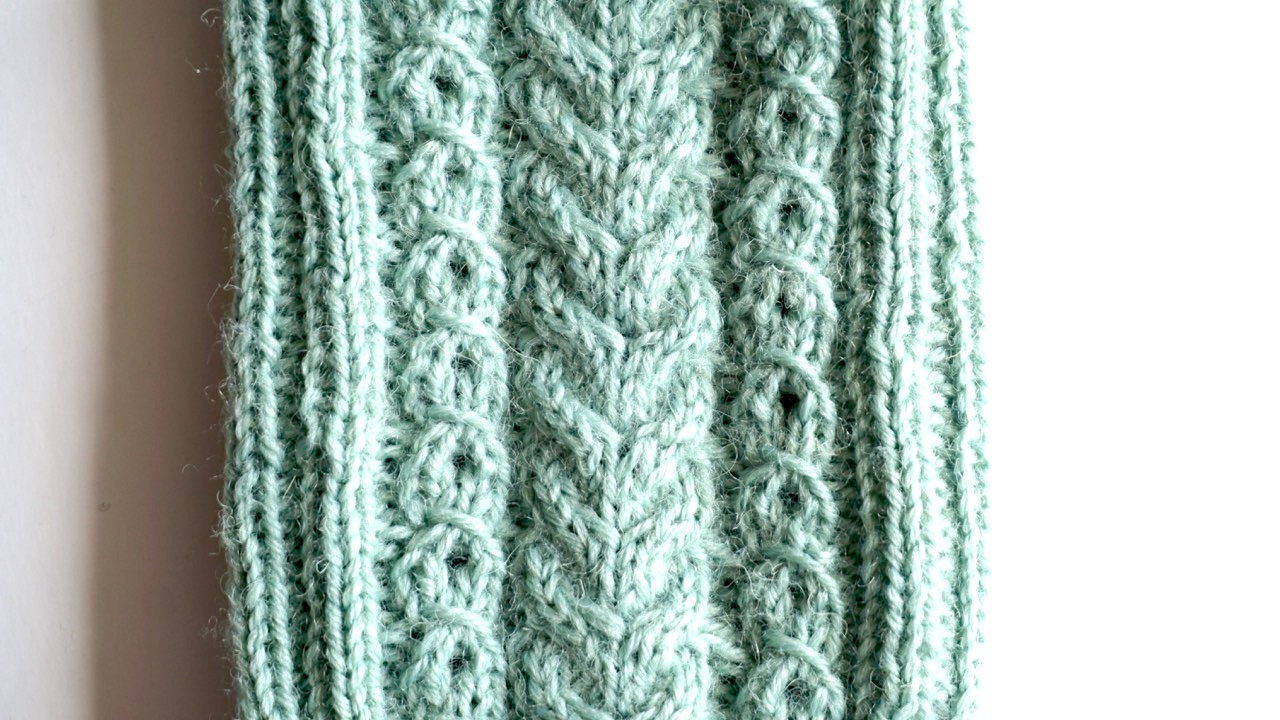
3. Cross Stitch Mock Cable
Cast on a number of stitches that is divisible by six.
Start by ribbing two rows of 4 knit stitches and 2 purl stitches.
Knit 4 stitches wrapping the yarn around the needle 2 times on each stitch (insert the needle through the stitch and wrap the yarn twice around the needle), purl 2 stitches. Repeat to end.
Slip 4 stitches (let the extra stitch you wrapped around the needle drop off the needle when slipping), then pull the 1st and 2nd stitches over the 3rd and 4th stitches (so that they cross over each other), move all 4 stitches back to your left needle and knit 4 stitches (these four stitches are the ones that you just pulled cross each other ), purl 2 stitches. Repeat to end.
Repeat these three rows until your work has reached the desired length.
Tip! This is an easy mock cable that creates a nice pattern in the middle that looks a bit like cross stitches. You can also easily make the pattern divisible by five by doing only 1 purl stitch.
Tips for Success with Mock Cable Knit Stitch
Even though it’s simple, a few small tips can make your mock cable knit look neater and more even:
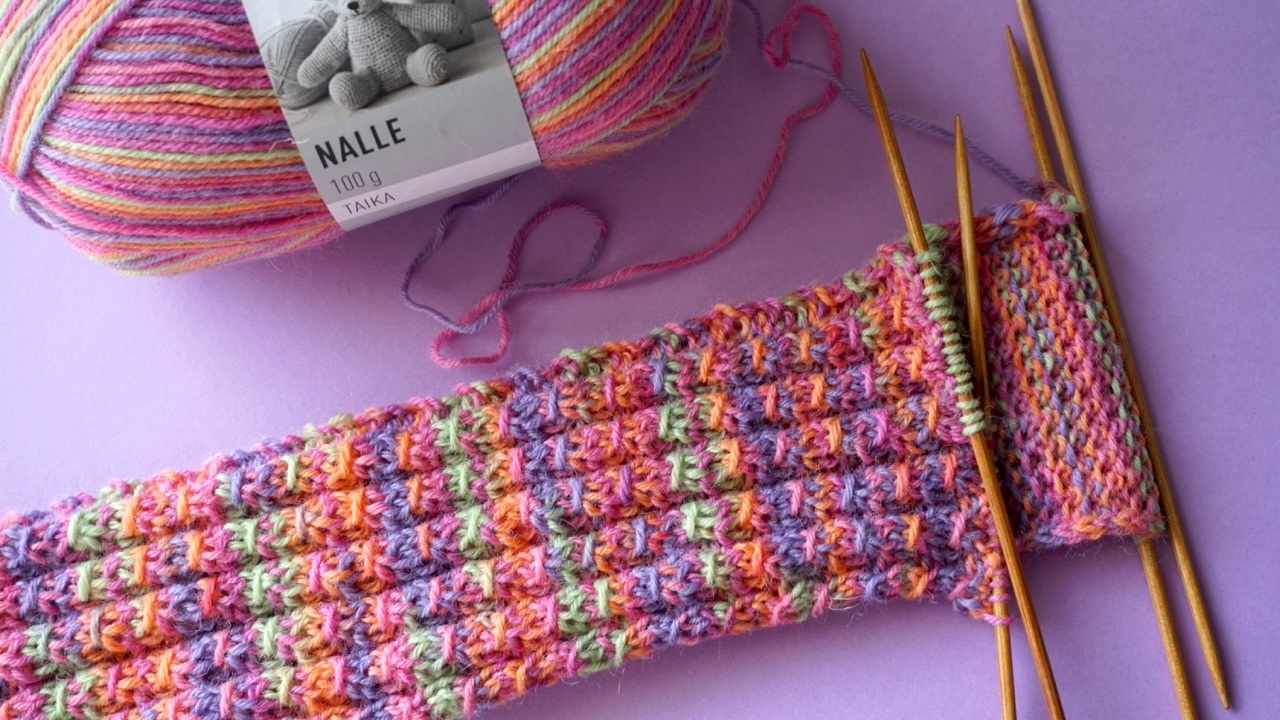
- Use smooth, non-fuzzy yarns. The pattern looks best in solid or lightly heathered yarns.
- Maintain consistent tension. A relaxed tension helps the pattern stand out.
- Block your finished piece to open the texture.
- Practice the lifting over and yarn round needle motion before starting your project.
These small details make a big difference in your final result and make your mock cable knitting stitch stand out beautifully.
Projects That Use the Mock Cable Knit Stitch
The mock cable knit stitch works well for many projects because it creates a flexible, textured fabric. Here are some ideas:
Cowls
The mock cable stitch makes an ideal texture and cowls. The small openings keep the fabric light, while the lifted stitches form an elegant line. Try knitting a cowl in this stitch using soft merino or cotton yarn. The faux cable columns run vertically, giving a clean, continuous twist with airy spaces between them.
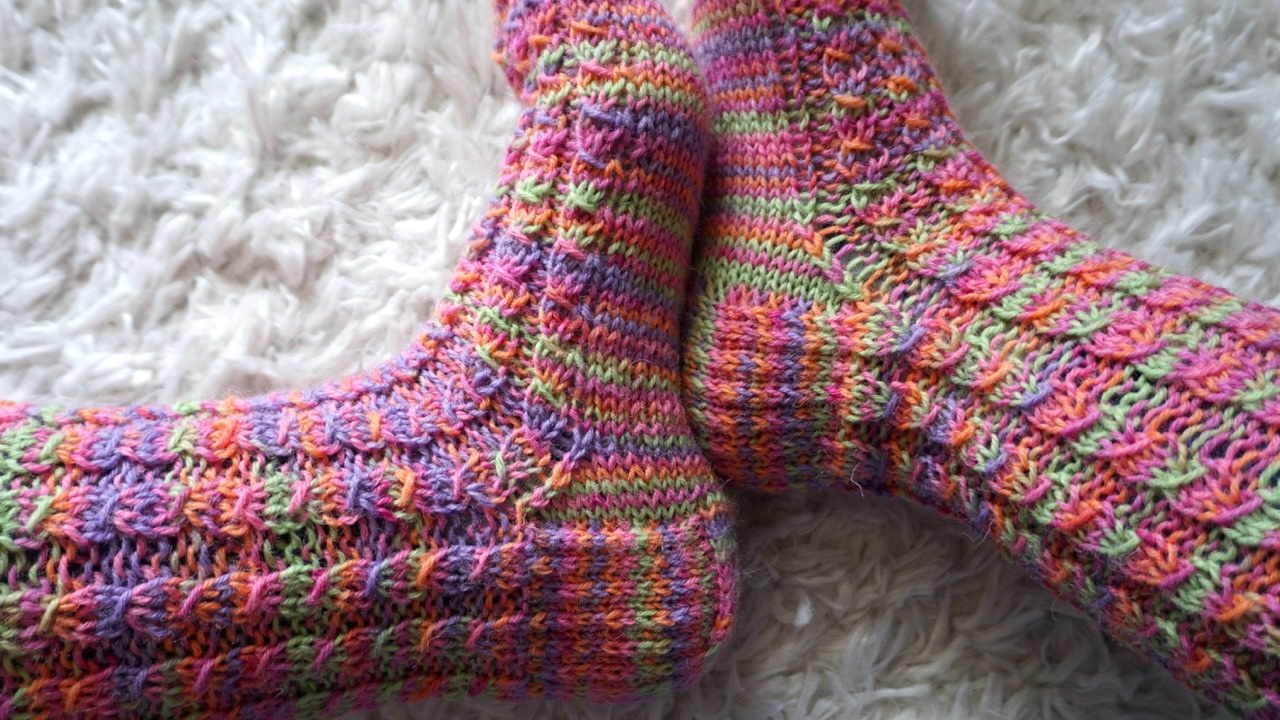
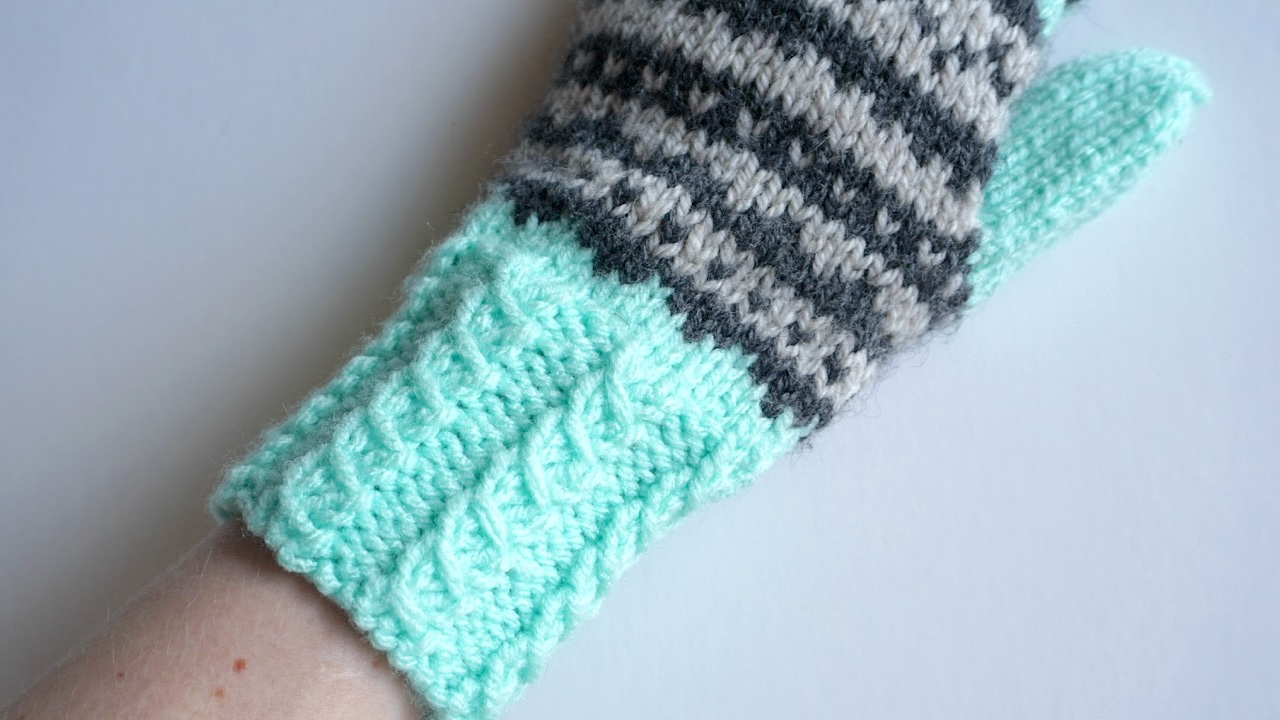
Socks and Mittens
The mock cable knit stitch adds pretty detail to small accessories like socks and mittens. The twisted cables create a decorative stripe that looks fancy but feels simple to knit. And since the mock cable is stretchy, it’s perfect for cuffs. Make sure to check out this beautiful yet simple mock cable sock pattern.
Sweaters and Cardigans
If you want a garment that’s stylish yet breathable, add mock cable panels to a cardigan or sweater. You can use the stitch along the sleeves, front bands, or as an all-over texture. The lifted stitches form elegant lines that flatter any shape.
Because it’s less dense than a real cable, it won’t make your sweater heavy or stiff. It’s a perfect pattern for layering pieces in spring or early fall.
Design Tips
The faux cable stitch is easy to adapt into your own designs. You can use it as an accent or main pattern.
If you’re designing your own pattern, space each column of mock cables with a few purl stitches. This makes each twist stand out more clearly.
Use color to highlight texture. Though the stitch already adds texture, it also looks great in ombré or tonal yarns. Avoid heavy variegation—it can hide the twist.
Keep in mind that the stitch is not reversible but the back side looks different. For reversible projects, use two-sided patterns.
Mock Cable vs Real Cable Knitting
It’s easy to confuse mock cables with real ones, but there are a few differences.
| Feature | Mock Cable Knit Stitch | Real Cable Knit |
|---|---|---|
| Uses cable needle | No | Yes |
| Difficulty | Easy | Intermediate |
| Speed | Faster | Slower |
| Texture | Flat with twist | Raised, rope-like |
| Flexibility | More stretchy | Denser |
Both stitches are beautiful, but the mock cable stitch wins when you want something quick and simple. It gives you a clean, modern texture without the extra effort.
Blocking and Finishing
When your knitting is done, take time to block it. Blocking helps define the cable shapes and smooths out the surface.
Here’s how to do it:
- Soak your piece in lukewarm water.
- Gently squeeze out excess water. Don’t wring.
- Lay flat on a towel or blocking mat.
- Shape to size and pin if needed.
- Let it dry completely.
After blocking, your cables will pop beautifully. Make sure to check out the detailed instructions for how to block knitting here.
Final Thoughts
The mock cable knit stitch proves that simple stitches can create stunning results. It offers texture, movement, and beauty with almost no effort. Whether you use it for a scarf, socks, or mittens, it will make your work stand out.
It’s the perfect pattern for beginners who want texture, or for experienced knitters who want an elegant stitch that doesn’t require extra tools.
So grab your needles, pick your yarn, and give it a try. With just a few rows, you’ll see the magic of mock cables come alive on your needles.
Happy knitting!
Read also:
- Long Tail Cast On for Knitting Beginners
- How To Knit a Stretchy Bind Off: 2 Easy Methods
- Mock Cable Sock Pattern for Beginners: Simple and Beautiful Texture
- Cable Knit: Easy Step-by-Step Guide for Beginners
- Knitting Mittens: A Complete Step-by-Step Guide for Beginners
- 10 Easy Knitting Patterns for Beginners
- 6 Useful Knitting Tips for Beginners