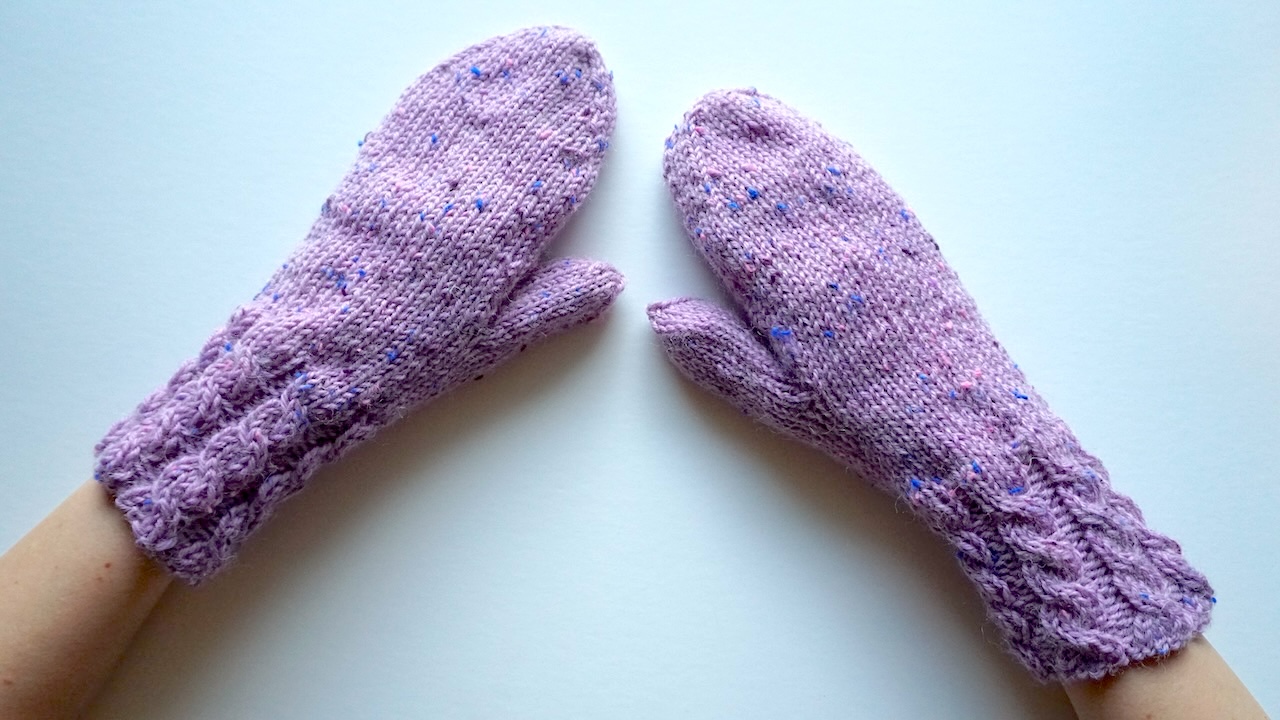
Knitting mittens is one of the most enjoyable and useful projects you can make. Mittens are quick to knit, practical to wear, and perfect for gifting. Whether you’re looking for a relaxing weekend project or want to improve your knitting skills, making your own mittens is a wonderful choice.
This tutorial will guide you through every step of knitting mittens—from casting on to shaping the thumb and finishing the top. You’ll learn how to create a cozy pair with a cable cuff and a smooth stockinette body. The cable adds a touch of texture and stretch, while the stockinette keeps the mitten warm, soft, and comfortable.
Even if you’re new to knitting, you can follow these simple instructions with confidence. I’ll use clear steps, helpful tips, and beginner-friendly techniques to make sure your first pair of knitted mittens turns out beautifully.
So grab your yarn and needles, find a comfy chair, and let’s start knitting mittens you’ll love to wear all winter long!
This post features affiliate links. If you use these links to buy something we may earn a commission at no additional cost to you. As an Amazon Affiliate we earn from qualifying purchases.
Why Knitting Mittens Is the Perfect Project
Mittens are simple yet satisfying to knit. They keep your hands warm and let you practice several essential knitting skills. You’ll work in the round, shape with increases and decreases, and learn how to create a thumb hole.
Unlike gloves, mittens knit up faster since there are no separate fingers. They’re also great for showing off texture or color. In this knit mittens pattern, the cable cuff adds a classic touch, while the stockinette body gives a smooth finish.
If you’re looking for a useful and cozy project, knitted mittens are the perfect choice.
Materials You’ll Need
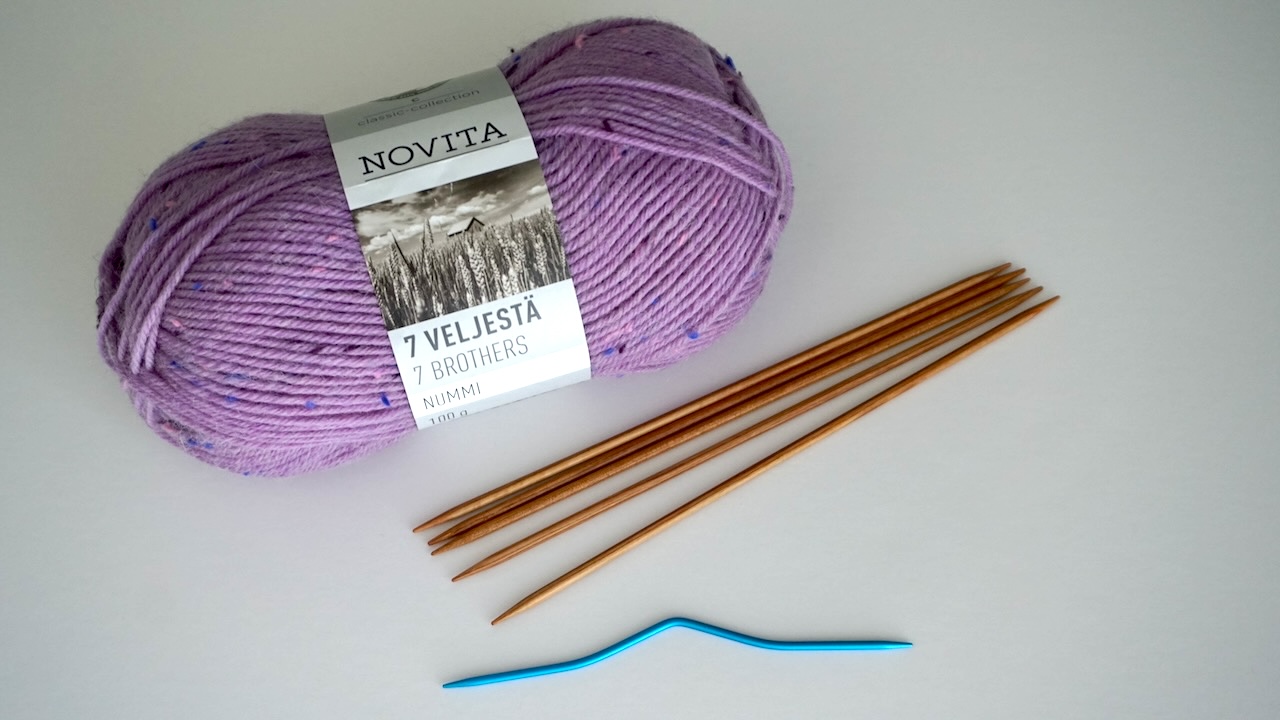
Before you start your knit mittens project, gather these supplies:
- Medium or aran weight yarn
- A set of 5 double pointed needles
- Cable needle for working the cuff pattern
- Tape measure to check length
- Tapestry needle for weaving in ends
- Scissors to trim yarn tails
Knit Mittens Pattern
This knit mittens pattern is simple yet elegant. The cable cuff adds charm, while the stockinette body keeps it smooth and stretchy.
Once you knit your first pair, you’ll want to make more in every color. They’re great for learning new skills, giving gifts, or just staying warm all winter long.
Skills Required: Cast on, bind off, knit, cable, top decreases, thumb hole, afterthought thumb
Dimensions: Fits an average women’s adult hand
Yarn: About 218 yards (200m) or 7oz (100g) of medium/aran weight yarn
Needles: Size US 4 (3.5mm) or according to your personal knitting gauge
Gauge: 24 sts = 4 inches (10cm)
These instructions will give you classic cuff-down mittens with an afterthought thumb. This is by far my favorite method for knitting mittens. The pattern fits an average women’s adult hand but you can easily adjust the length or width as needed for different sizes. Just keep in mind that this is a 6-stitch pattern so you want the stitch count to be divisible by six.
- For men’s mittens: Cast on 48 stitches instead of 42.
- For children’s mittens: Cast on 30 or 36 stitches.
- For longer cuffs: Add more cable repeats.
- For shorter cuffs: Stop after one repeat.
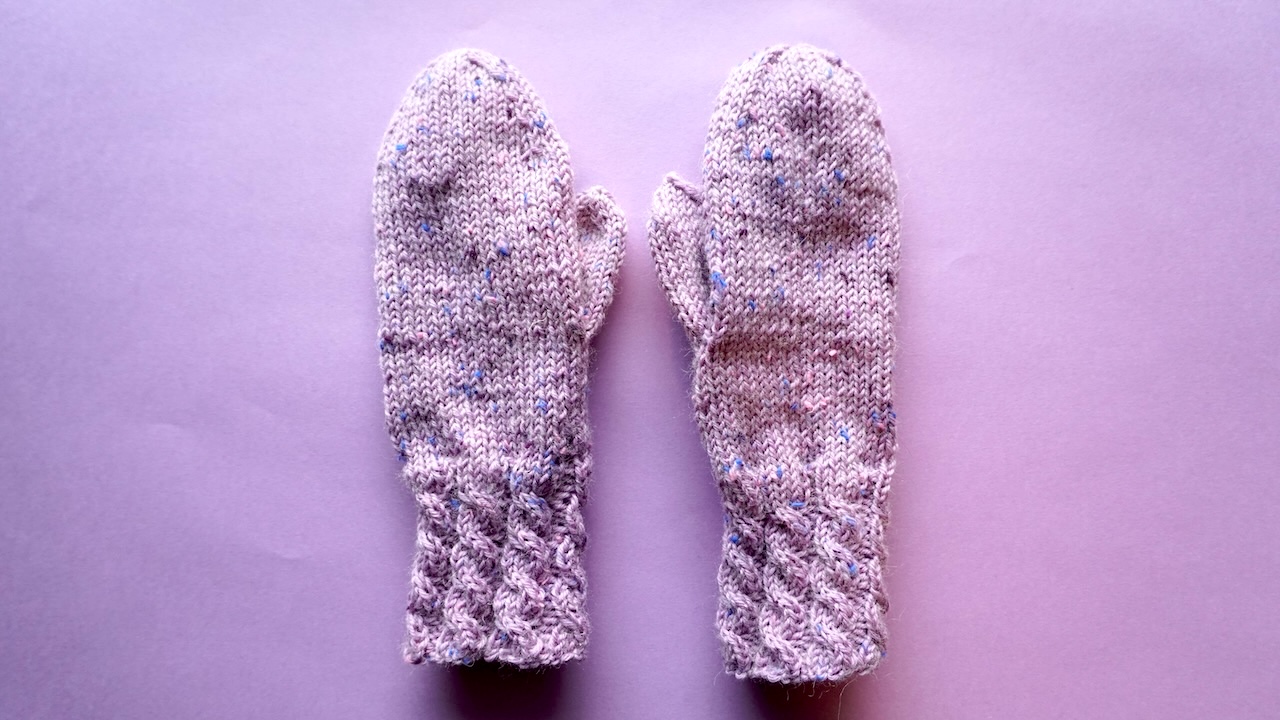
I am using Novita 7 Brothers yarn in color 951 Freedom. It’s a beautiful light purple yarn that has a wonderfully vibrant texture and splashes of royal blue and light pink color. Wool blend is great for warmth and keeping your fingers toasty in the winter cold.
I am using US 4 (3.5mm) needles for these mittens. If your gauge differs, adjust needle size as needed.
Step-by-Step Instructions: How to Knit Mittens
Now that your materials are ready and specs in check, let’s go through the process of knitting mittens step by step.
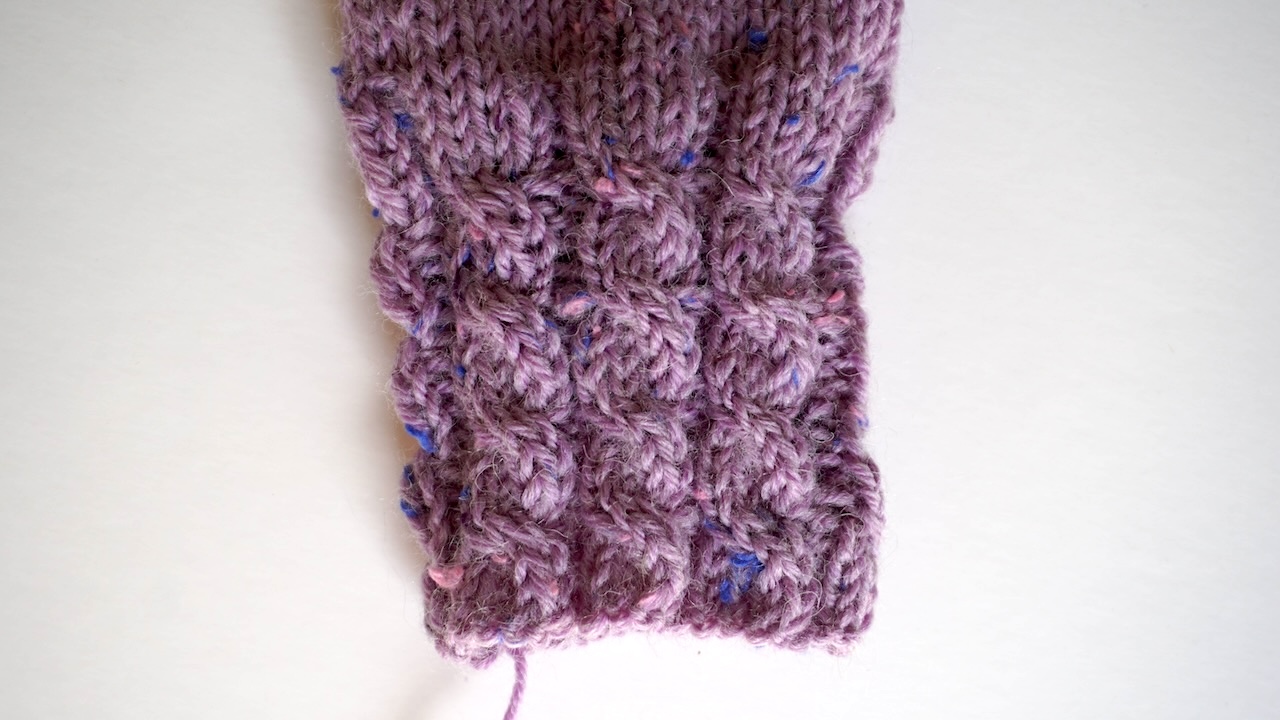
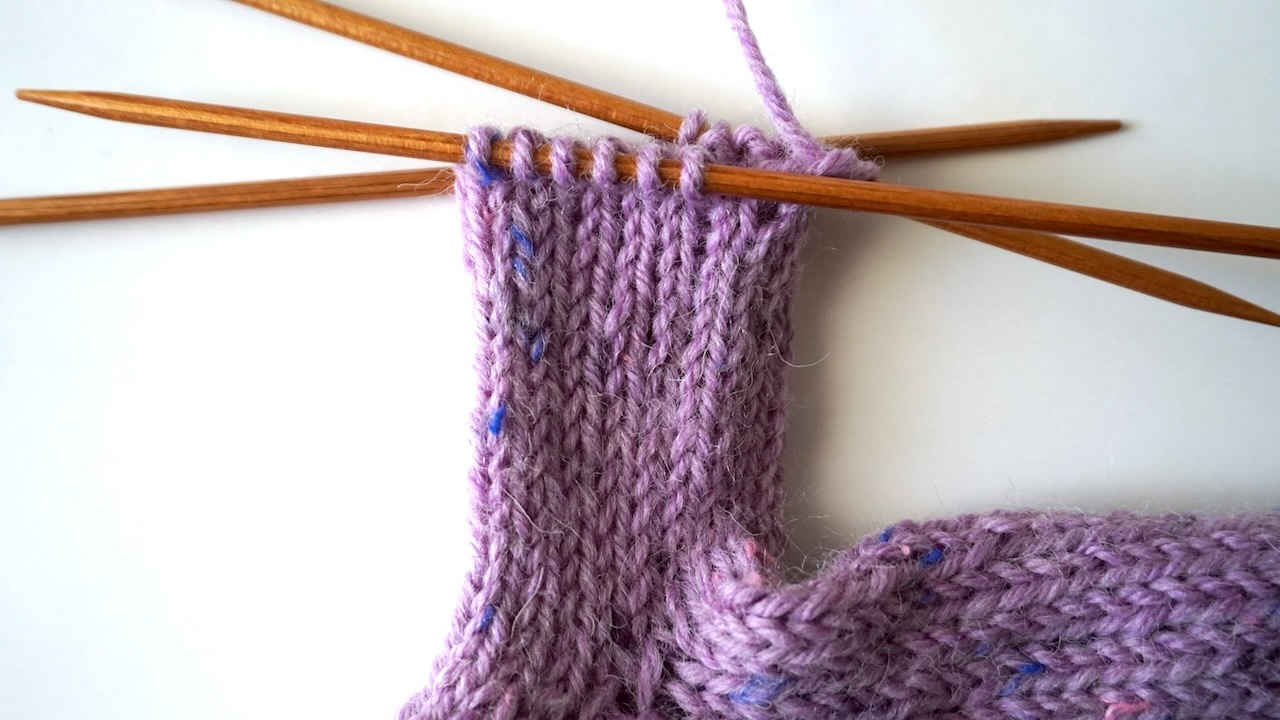
Step 1: Cast On and Knit the Cable Cuff
Start with your cuff. The cable section adds texture and stretch to your mitten.
Start by casting on 42 stitches using the long tail cast-on.
Then divide the stitches on four needles so that you’ll have 10-12-10-10 stitches on your needles. You can divide the stitches also differently, if you feel like it. But in my opinion, the cable pattern is easiest to knit when the stitches are divided this way. The pattern will be cut between needles 3 and 4 but just keep knitting the pattern the normal way.
Next, join in the round, making sure the stitches aren’t twisted and start knitting the 4-stitch cable pattern for the cuff:
- Rounds 1 to 4: Knit 4 stitches and purl 2 stitches.
- Round 5: Move 2 stitches onto the cable needle, knit 2 stitches, knit 2 stitches from the cable needle, and purl 2 stitches. Repeat to the end of round.
Repeat these rounds 1 to 5 four times. Then knit rounds 1 to 4 one more time. If you want the cuff to be shorter or longer, adjust the amount of rounds 1 to 5 accordingly.
Make sure to check out my detailed instructions with step-by-step images for knitting cables here.
Next, you will be decreasing a total of fours stitches to get a nice shaping around the wrist so that the body of the mitten will not be too baggy.
To do this, work a SKPO decrease (slip 1 stitch, knit 1 stitch, and pass the slipped stitch over) at the beginning of needles 1 and 3 and at the end of needles 2 and 4.
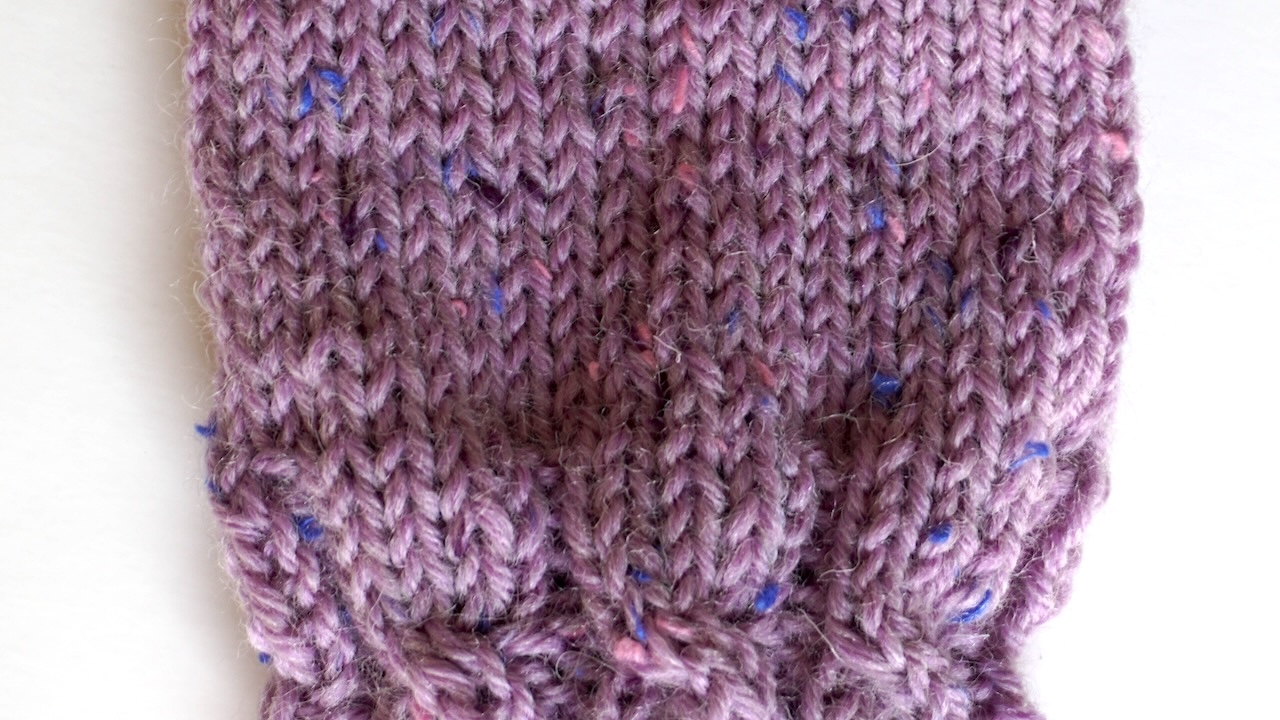
Step 2: Knit the Hand Section
Once you finish the cuff, it’s time to knit the hand section or body of the mitten.
First, divide the stitches on four needles so that you’ll have 10-9-10-9 stitches on your needles.
Then continue knitting 15 rounds in stockinette stitch (knit every stitch in every round). The mitten should cover the lower part of your palm.
This section will grow quickly since it’s all knit stitches. Check your tension to keep the fabric even.
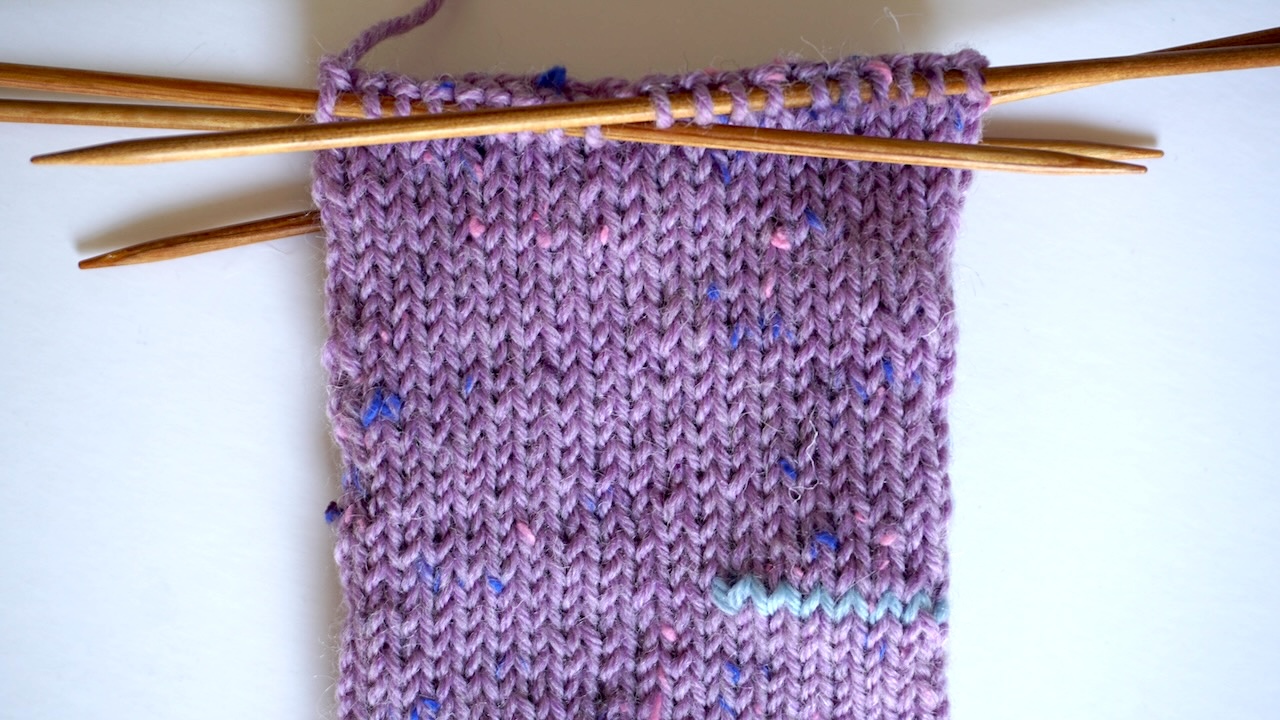
Step 3: Place the Thumb Stitches on Hold
Now that your lower part of the hand section is shaped, you’ll separate those stitches for the thumb.
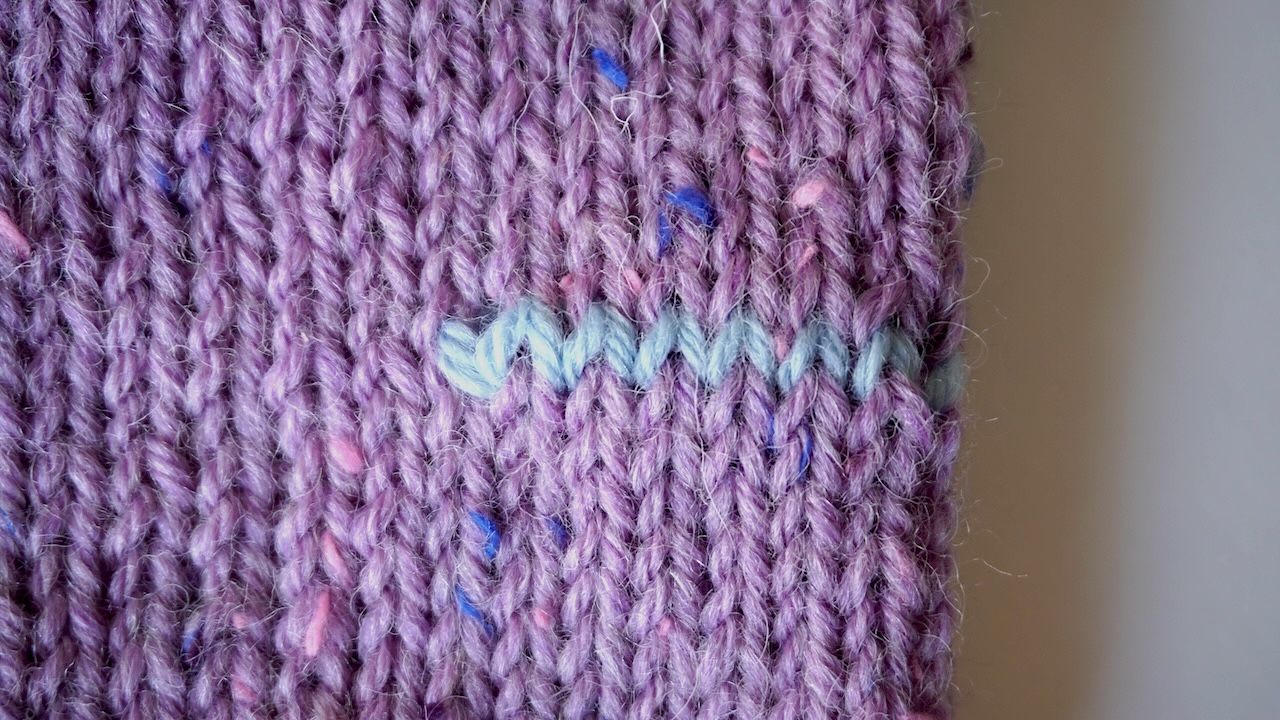
For this, you’ll need a short piece of yarn. Any yarn—such as any type of left-over yarn—will do, but it’s helpful if it’s a different color and same thickness (or close to it) to your working yarn.
You’ll work the thumb hole at the end of needle 2 for the left-hand mitten and at the beginning of needle 3 for the right-hand mitten.
Right-hand mitten:
- Knit all stitches on needles 1 and 2.
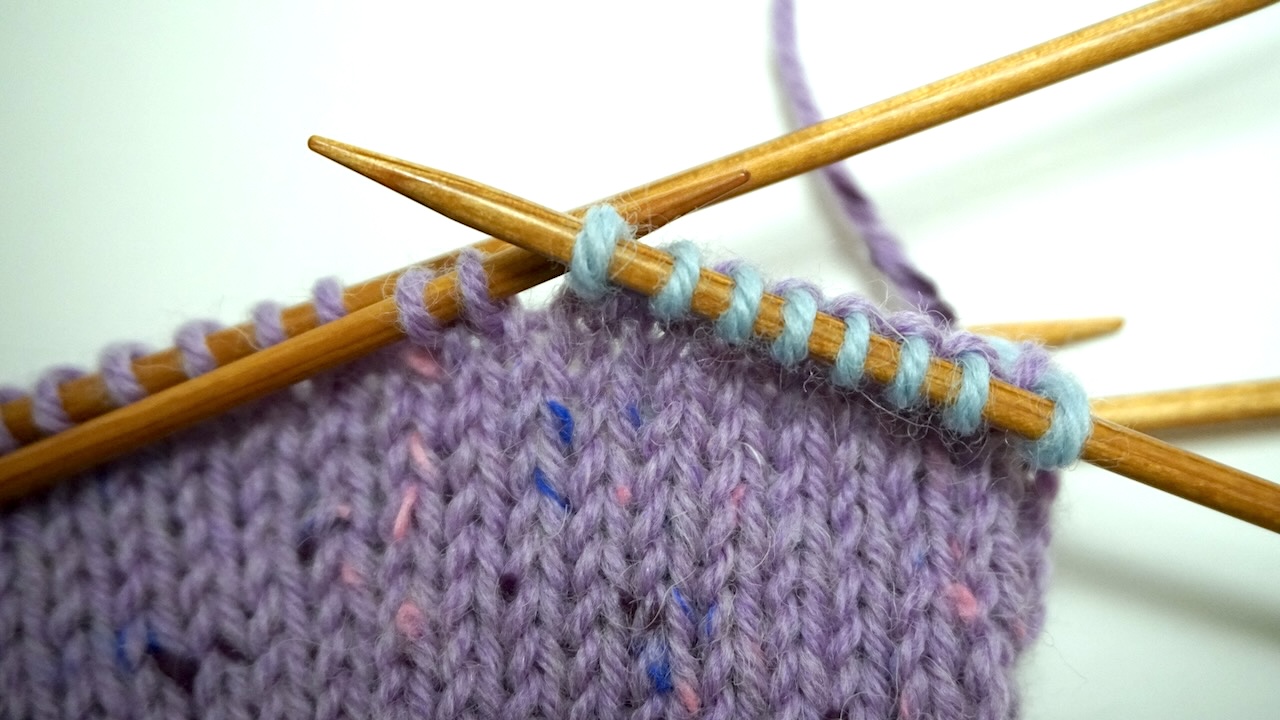
- Knit 8 stitches with a yarn in different color.
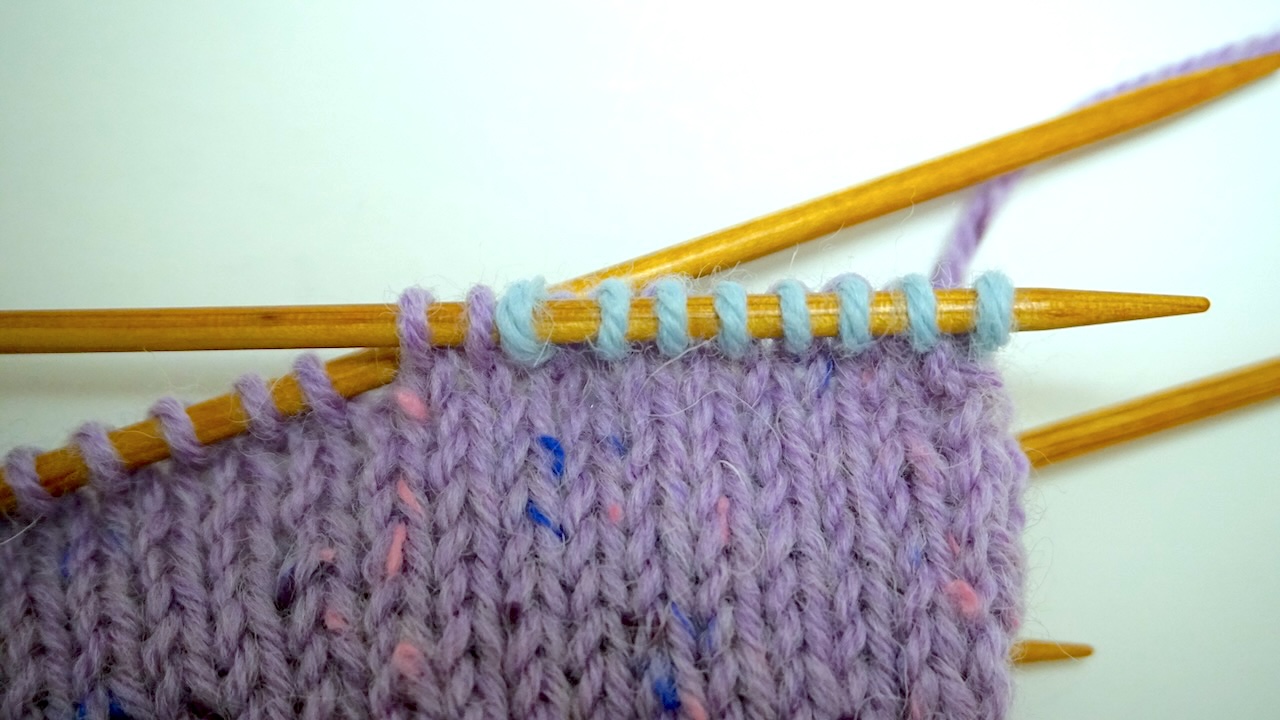
- Move the 8 stitches you just knit with different color back to your left needle.
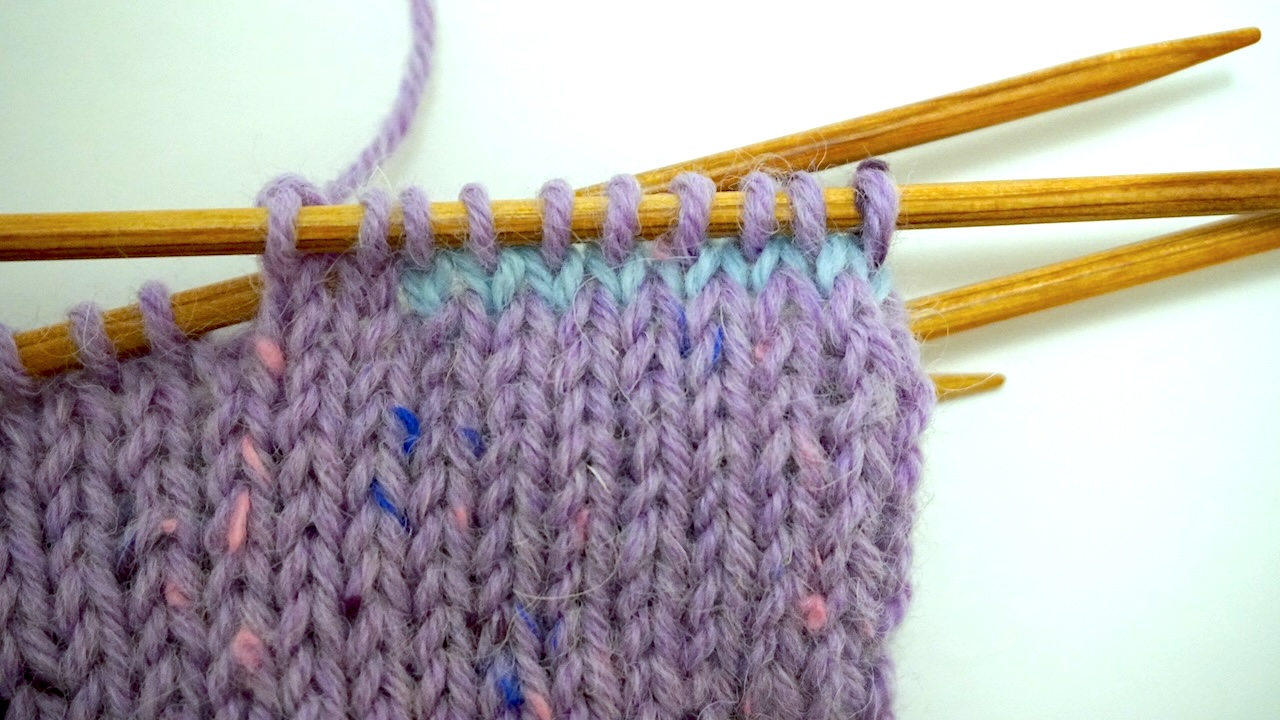
- Knit these 8 stitches and all remaining stitches on needle 3 with working yarn.
- Knit all stitches on needle 4 with working yarn.
Left-hand mitten:
- Knit all stitches on needle 1.
- Knit until you have 8 stitches left on needle 2.
- Knit 8 stitches with a yarn in different color.
- Move the 8 stitches you just knit with different color back to your left needle.
- Knit these 8 stitches with working yarn.
- Knit all stitches on needles 3 and 4 with working yarn.
Note! Remember to make the thumb hole of each mitten at the different position so that you will not end up with two mittens for the same hand!
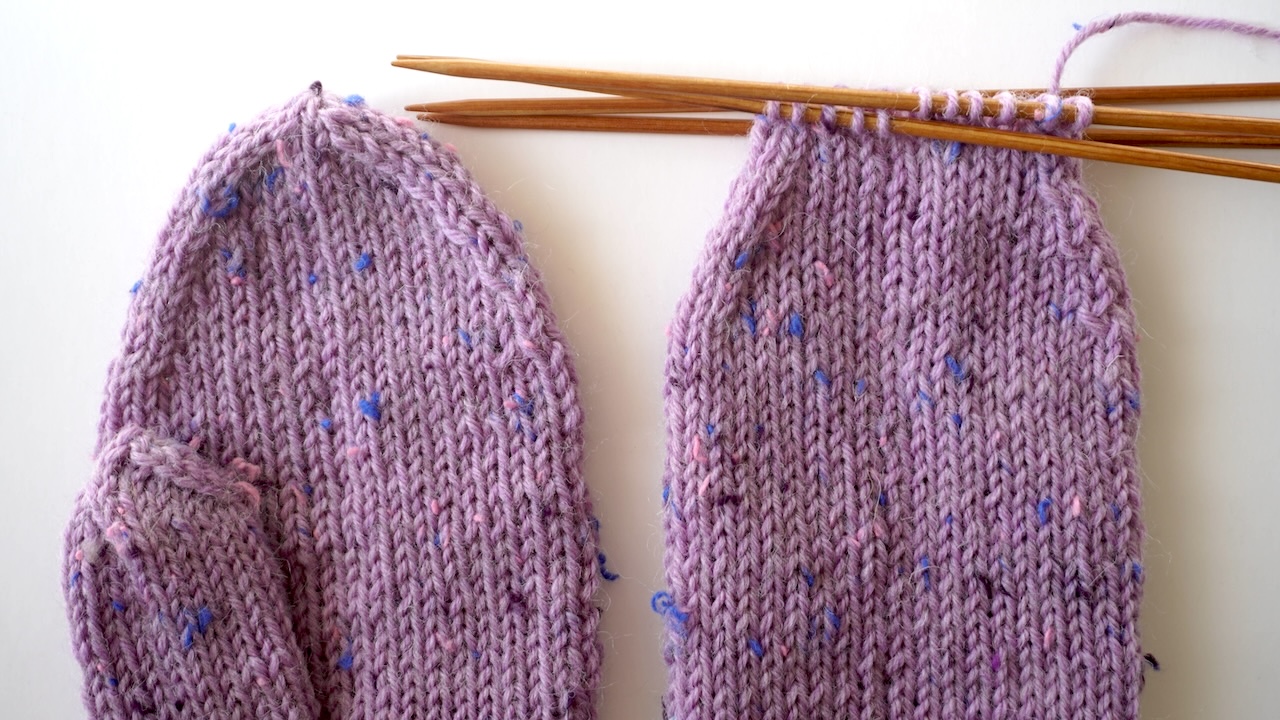
Step 4: Knit the Hand to the Fingertips
At this point, your mitten starts to take shape. You’re now knitting the main hand section.
Keep knitting every round for 22 rounds or until the mitten reaches the bottom of your pinky finger’s nail.
You can try on the mitten to check the length. The fabric should stretch comfortably over your hand.
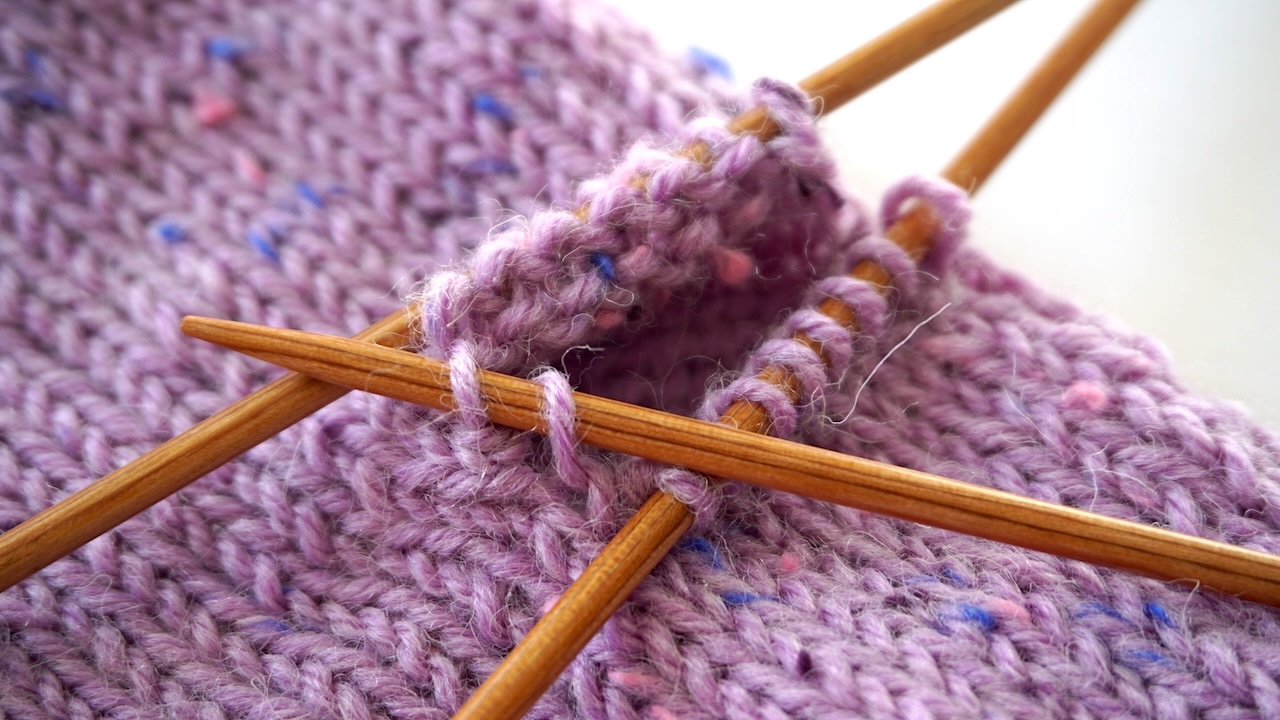
Step 5: Shape the Top of the Mitten
Now it’s time to decrease for the fingertips. You will work decreases at the beginning of needles 1 and 3 and at the end of needles 2 and 4.
Here’s how to shape the top:
- Work 1 decrease round:
- Needle 1: Knit 1 stitch, slip 1 stitch knitwise, knit 1 stitch, pass the slip stitch over the knit stitch and off the needle. Knit the remaining stitches.
- Needle 2: Knit until 3 stitches remain, knit 2 stitches together, knit the last stitch.
- Needle 3: Knit 1 stitch, slip 1 stitch knitwise, knit 1 stitch, pass the slip stitch over the knit stitch and off the needle. Knit the remaining stitches.
- Needle 4: Knit until 3 stitches remain, knit 2 stitches together, knit the last stitch.
- Work 3 rounds of plain knit stitches.
- Work 1 decrease round and 2 rounds of plain knit stitches. Repeat one more time.
- Work 1 decrease round and 1 round of plain knit stitches.
- Work decrease rounds only until 10 stitches remain (3-2-3-2).
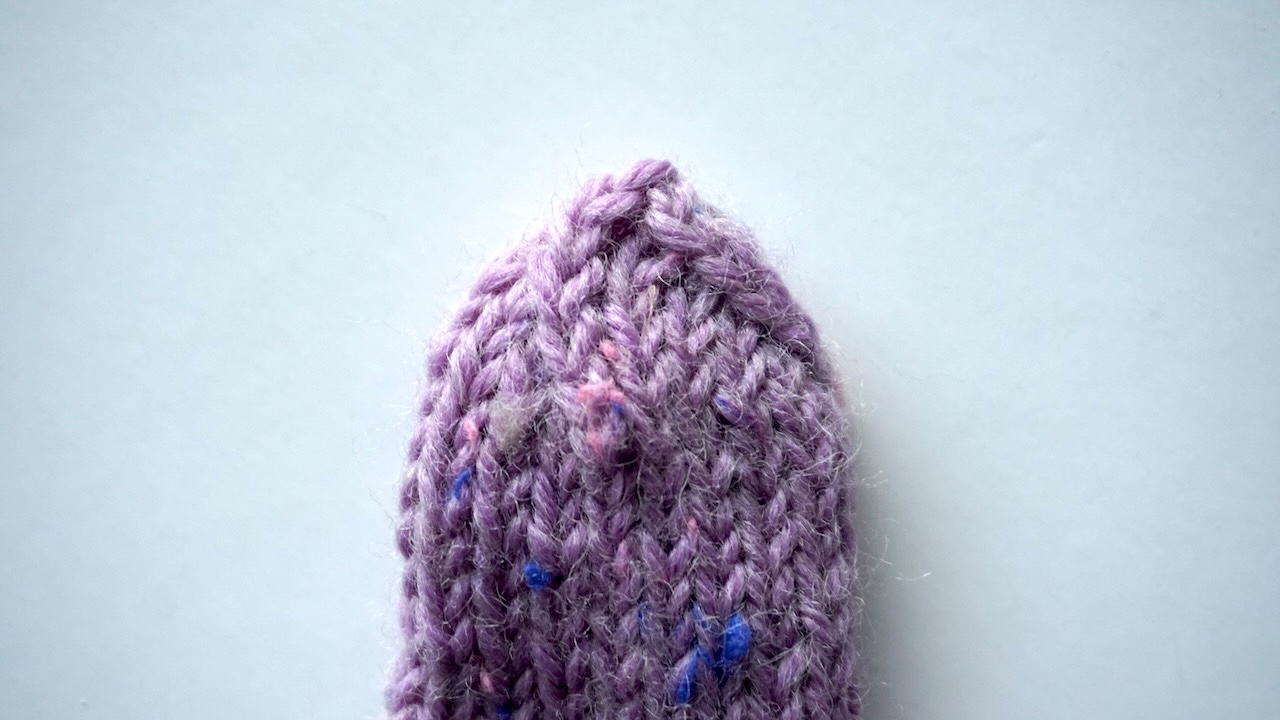
- Finally, work decreases only on needles 1 and 3 and DO NOT knit the stitches on needles 2 and 4 AT ALL. Just skip needle 2 and go straight to needle 3. If you were to knit the stitches on needles 2 and 4, the top would become very pointy and weird looking.
Then cut the yarn, leaving a 6-inch tail. Thread it through the remaining stitches and pull tight to close. Weave in the yarn tails on the inside.
Tip! You can also use a different method for decreasing the top of the mitten. These knitting patters for sock toes work well also for mitten tops!
Step 6: Knit the Thumb
Now it’s time to finish the thumb.
Start by removing the yarn in different color. Now you have 15 live stitches in your work.
First, pick up 8 stitches (the same amount of stitches that you knit with the different colored yarn) from the edge under the thumb hole and 7 stitches from the edge above the thumb hole. You should have 15 stitches total.
Then pick up 2 more stitches from the outer edge of the hole and 1 stitch from the inner edge of the hole. Now you have a total of 18 stitches.
Divide the stitches on three needles so that you’ll have 6-6-6 stitches on your needles and start knitting stockinette stitch in the round. Knit the stitches that you picked up on the sides of the hole through the back loop on the first round to make a twist. This way, you’ll avoid holes at the bottom of the thumb.
Knit 15 rounds plain knit stitches or until half of the nail of your thumb is covered.
Then it’s time to start decreasing. You will work SKPO decreases at the beginning of each needle and on every round: slip 1 stitch knitwise, knit 1 stitch, pass the slipped stitch over the knit stitch and off the needle. Knit the remaining stitches on the needle.
Once you have 1 stitch on each needle, cut the yarn, pass the tail trough the remaining stitches, and pull tight to close. Weave in all loose ends with your tapestry needle.
Once you’ve finished knitting both of the mittens, I highly recommend that you block your mittens. Blocking evens out the stitches and enhances the look of the cable cuff.
Tips for Success When Knitting Mittens
Here are a few extra tips to help you get perfect results:
- Try on as you go. It’s the best way to check fit.
- Keep tension even. Especially between double-pointed needles, where gaps can form.
- Choose soft yarn. It makes the mittens comfortable and warm.
- Knit both mittens at once. You can work on two sets of needles to keep them identical.
With a little practice, you’ll find that knitting mittens becomes second nature.
Styling Your Knitted Mittens
Knitted mittens are not only warm but also stylish. You can make them in neutral tones for a classic look or bold colors for a fun twist. Try adding stripes and different cuff textures—1×1 ribbing creates a classic and stretchy cuff.
The cable cuff gives a timeless design that pairs beautifully with coats and sweaters. If you love matching sets, you can knit a hat or scarf in the same yarn for a coordinated look.
Mittens also make wonderful handmade gifts. Everyone appreciates something cozy and crafted with care.
Common Questions About Knitting Mittens
1. How long does it take to knit mittens?
It depends on your speed, but most knitters finish a pair in two to three days.
2. Can I knit mittens on circular needles?
Yes! You can use the magic loop method if you prefer one long circular needle instead of double-pointed ones.
3. What yarn is best for mittens?
Wool or wool blends are ideal. They provide warmth and elasticity, which help the mittens fit well.
4. How can I make my mittens warmer?
You can line them with fleece or knit them using two strands of yarn held together.
5. Are mittens easy to knit?
Yes, especially if you follow clear step-by-step instructions like this pattern. The shaping might seem tricky at first, but it gets easier quickly.
Final Thoughts
Knitting mittens is a classic project that every knitter should try. With just a few basic skills, you can create something warm, beautiful, and practical. Mittens make wonderful gifts and are a perfect way to use your favorite yarns.
With this easy-to-follow pattern, you can knit mittens that fit perfectly and look amazing. Once you’ve mastered this knit mittens pattern, you can easily adjust the size, change the color, or even experiment with new textures. The possibilities are endless, and each pair will feel more personal than anything store-bought.
So pick up your needles again, choose your favorite yarn, and start knitting mittens today. Your hands will thank you when the cold weather arrives!
Happy knitting!
Next projects:
- How To Knit a Beanie in 4 Simple Steps
- Mock Cable Sock Pattern for Beginners: Simple and Beautiful Texture
- Knitting Colorwork Socks: Unikko Knitting Pattern
- 10 Easy Knitting Patterns for Beginners
- Cozy Neck Warmer Knitting Pattern
- Infinity Scarf Knitting Pattern for Cozy Elegance
- How To Make Knitted Hand Warmers
- Knitting Leg Warmers: Your Ultimate Guide With Free Patterns
- Dog Sweater Knitting Pattern: A Step-by-Step Tutorial