Knitting leg warmers is the perfect crafty solution to keep you cozy during chilly seasons. Whether you’re a beginner or a seasoned knitting enthusiast, this fashion accessory is a versatile addition to your collection.
From selecting the right yarn to choosing trendy patterns, I’ve got you covered. In this guide, I’ll show you how to knit leg warmers, providing you with all the tips and tricks you need. On top of that, I will share two of my favorite leg warmer knitting patterns:
So, grab your knitting needles and get ready for a fun and quick project that ensures that your legs stay toasty and you make a fashionable statement. Get cozy, get creative, and get started on your journey of knitting leg warmers!
This post features affiliate links. If you use these links to buy something I may earn a commission at no additional cost to you. As an Amazon Affiliate I earn from qualifying purchases.

Knitting Leg Warmers for Style and Comfort
When it comes to staying warm and stylish during the colder months, knitted leg warmers, or ankle warmers, is a fantastic choice. These cozy accessories cover the lower legs, from the ankles to just below the knees. They are designed to provide warmth and comfort, especially during colder seasons and they can add a touch of flair to your outfits while keeping your legs toasty.
Originally popularized as activewear in the 1980s, leg warmers were often worn by dancers and athletes to keep their muscles warm and prevent strains. Over time, leg warmers evolved to become a fashionable accessory, making their way into everyday attire. They come in various colors, patterns, and materials, allowing for a wide range of style options.
Today, leg warmers serve both functional and fashion purposes. They offer extra insulation in cold weather and are often worn as a cozy alternative to thick socks or boots. Additionally, they can add a trendy and retro touch to outfits, making them a versatile accessory for individuals looking to stay warm while expressing their personal style.
You can wear them over jeans or leggings for extra warmth during chilly days, or you can pair them with a skirt or dress for a chic, layered look. They come in various styles, from simple and classic to bold and funky, making them a must-have accessory for any fashion-conscious individual.
Knitting leg warmers is a fun and easy project both for beginners and experienced knitters. You can tailor your knit ankle warmers to your skill level and personal style. They also make a great knitted gifts!

Knitting Leg Warmer Patterns for All Skill Levels
Whether you’re a seasoned knitting pro or just starting, there are knit leg warmer patterns suitable for every skill level. From simple ribbing to intricate cable designs, you’ll find patterns that match your expertise. Remember, it’s all about enjoying the process and creating something you love.
The world of knitted leg warmer patterns is incredibly diverse, catering to knitters of all levels. If you’re new to knitting, don’t worry. There are plenty of straightforward patterns that will help you build your skills while creating a stylish accessory.
For beginners, a basic ribbed pattern is a great place to start. Ribbing creates a stretchy and snug fabric, making your leg warmers fit comfortably. You’ll learn fundamental knitting techniques such as knit and purl stitches, which are the building blocks of many patterns.
If you’re an intermediate knitter, you can explore patterns with more complexity. Consider trying out lace patterns, which add an elegant touch to your knit ankle warmers. Lace patterns often involve yarn overs and decreases to create intricate designs.
For the advanced knitter, the possibilities are endless. Cable-knit leg warmers are a challenging yet rewarding project. Cables create a beautiful textured fabric, and mastering them can be a source of pride.
Whatever your skill level, the key to successful leg warmer knitting is patience and practice. Don’t be discouraged by mistakes; they’re all part of the learning process. In the end, you’ll have a pair of ankle warmers that you can proudly say you created yourself.

How To Knit Leg Warmers
Next, I will be sharing two of my favorite leg warmer knitting patterns: ribbed leg warmers and ribbed checks leg warmers. Both of these patterns are great for beginners. They also offer a great opportunity for practicing knitting with double pointed needles.
You will need the following materials and tools for knitting both of these leg warmers:
Skills Required: Cast on, bind off, knit, purl
Dimensions: About 12 inches (30cm) long and 4 inches (10cm) wide (not stretched)
Yarn: About 218 yards (200m) or 3.5oz (100g) of medium weight (worsted or aran) yarn
Needles: Size US 6 (4mm) or according to your personal knitting gauge
Gauge: 5 sts per inch
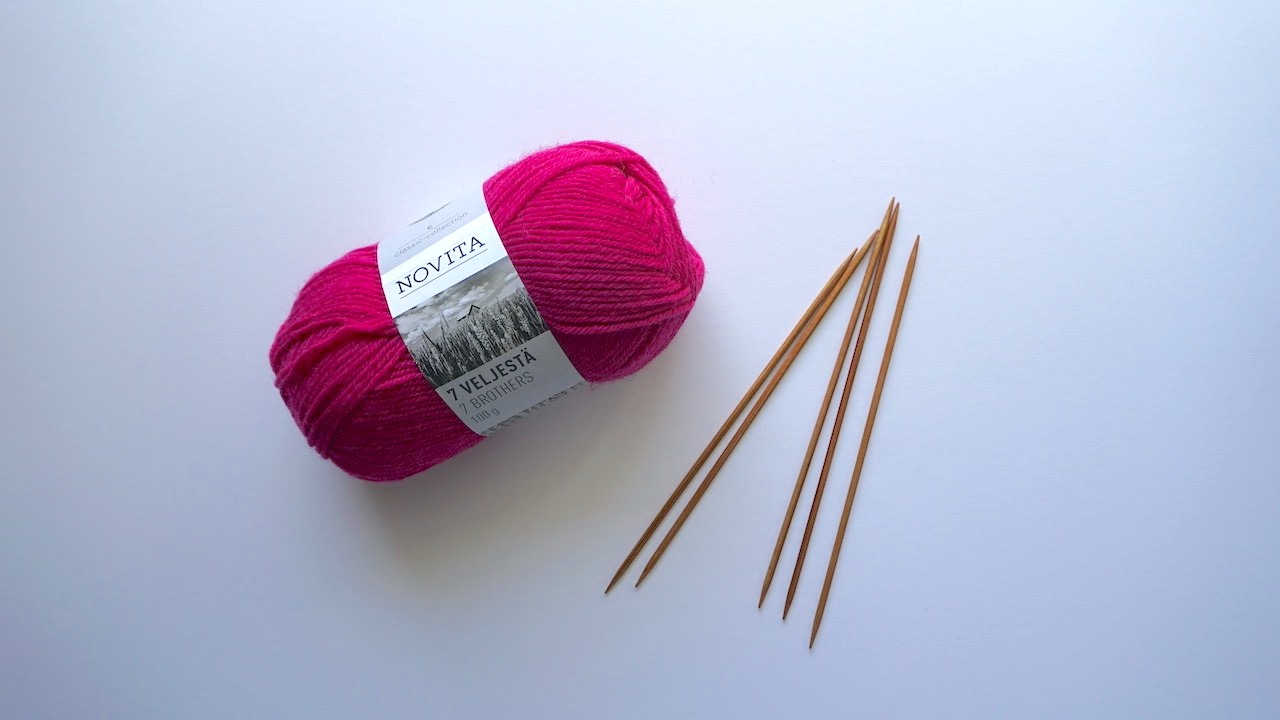
By following these instructions, you will create a regular sized knitted leg warmers. I am using Novita 7 Brothers yarn in color 500 May Day for the ribbed pattern and in color 724 Veil for the ribbed checks pattern. I am using a bit smaller double pointed needles US 4 (3.5mm) than recommended in both versions as I noticed that my knitting was a bit loose.
It is very easy to make both patterns larger or smaller by increasing the number of stitches. Just remember to add or reduce the stitches by eight to match the pattern because the pattern is divisible by 8.
Ribbed Leg Warmer Knitting Pattern
This leg warmer knitting pattern is a simple 4×4 rib knit design with an easy 8 stitches repeat.
It’s very easy and quick to knit these leg warmers, which makes this a great project for beginners.
- Cast on 56 stitches and divide on 4 needles.
- Knit 4, purl 4 until the end of round.
- Continue repeating until the leg warmer height reaches about 12 inches (30cm) or the desired length.
- Bind off in pattern and weave in the ends.
1. Cast On
Start by measuring about 34 inches (85cm) of yarn for the long tail cast-on.
Next, tie a slip knot and place it on two double pointed needles.
Then cast on 55 stitches so that you will have 56 stitches on your needles. Once you are done casting on, remove one of the needles.
Finally, divide the stitches on four needles so that you’ll have 14 stitches on each needle. The fifth needle without any stitches is your working needle.

2. Leg Body
Be careful not to twist the needles and stitches when you join into round and start knitting your first round.
Start to knit in 4×4 rib stitch:
- Knit 4 stitches.
- Purl 4 stitches.
- Repeat these 8 stitches until the end of round.
Continue repeating this one round until your leg warmer is about 12 inches (30cm) long. You can also make it shorter or longer if you want to match your personal reference.

3. Bind Off
Now it’s time to bind off in pattern. To bind off, knit the first two stitches from your needle 1 onto your working needle.
Next, insert your needle 1 into the first stitch you knit on your working needle, that is the stitch farther away. Now, pull the first stitch over the second stitch and drop it off the needle.

Continue this to bind off all stitches on all needles until you have one stitch left on your working needle.
Remember to bind off in pattern, meaning that you will knit the knit stitches and purl the purl stitches. Also keep your stitches loose when binding off in ribbing to keep the bind off elastic.
Then cut the yarn leaving about 8-inch (20cm) tail and pull it through the last loop.
4. Finish
Finally, weave in both tail ends with a tapestry needle and cut off any extra length.
Now your first leg warmer is finished!
Next, knit the second leg warmer the same way. Once both leg warmers are ready, block them if desired. Check out the instructions for how to block knitting here.

Ribbed Checks Leg Warmer Knitting Pattern
This ribbed checks leg warmer pattern creates a beautiful checked design. It is a bit more complicated than the first pattern, however, it is also very easy project as it also involves only knitting and purling. Basically, the only difference is the order of the knit and purl stitches.
- Cast on 56 stitches and divide on 4 needles.
- Rounds 1–15: Knit 2, purl 2 until the end of round.
- Rounds 16–20: Purl 2, knit 2 until the end of round.
- Rounds 21–25: Knit 2, purl 2 until the end of round.
- Repeat rounds 16 to 25 for five more times (or until the leg warmer height reaches the desired length).
- Repeat rounds 1 to 15.
- Bind off in pattern and weave in the ends.
1. Cast On
Start by measuring about 34 inches (85cm) of yarn for the long tail cast-on.
Next, tie a slip knot and place it on two double pointed needles.
Then cast on 55 stitches so that you will have 56 stitches on your needles. Once you are done casting on, remove one of the needles.

Finally, divide the stitches on four needles so that you’ll have 14 stitches on each needle. The fifth needle without any stitches is your working needle.
Be careful not to twist the needles and stitches when you join into round and start knitting your first round.
2. Ribbed Cuff
Start knitting the cuff in 2×2 rib stitch:
- Knit 2 stitches.
- Purl 2 stitches.
- Repeat these 4 stitches until the end of round.
Keep knitting and purling like this for a total of 15 rounds.

3. Leg Body
Next, start knitting the leg body in a checkered pattern:
- Purl 2 stitches and knit 2 stitches until the end of round.
- Repeat these 2 stitches for 5 rounds.
- Knit 2 stitches and purl 2 stitches until the end of round.
- Repeat these 2 stitches for 5 rounds.
Continue repeating these 10 rounds for five more times or until the leg warmer height is about 2 inches (5cm) shorter than the desired length. If you decide to adjust the length, repeat the pattern for an odd number (3, 5, 7, 9, etc.) so that both cuffs will be symmetrical.

Then knit a 2×2 rib stitch cuff also to the other end of the leg warmer:
- Knit 2 stitches.
- Purl 2 stitches.
- Repeat these 4 stitches until the end of round.
Keep knitting and purling like this for a total of 15 rounds.

4. Bind Off
To bind off, knit the first two stitches from your needle 1 onto your working needle.
Next, insert your needle 1 into the first stitch you knit on your working needle. Then lift the first stitch over the second stitch and drop it off the needle.
Continue this to bind off all stitches on all needles until you have one stitch left on your working needle.

Remember to bind off in pattern so that you will knit the knits and purl the purls. Also keep your stitches loose to keep the bind off elastic.
Then cut the yarn leaving about 8-inch (20cm) tail and pull it through the last loop.
5. Finish
Finally, weave in both tail ends with a tapestry needle and cut off any extra length.
Now you have completed your first leg warmer! Then just repeat the pattern to knit the second leg warmer.
Once you have finished both leg warmers, you can block them if desired. Check out the instructions for how to block knitting here.

Selecting the Right Yarn for Your Ankle Warmers
The key to knitting comfortable and durable leg warmers lies in choosing the right yarn. Opt for soft, warm, and washable yarn to ensure your leg warmers are both cozy and easy to care for.
When it comes to yarn selection for your knitted leg warmers, you’ll want to consider several factors. Firstly, think about the climate in which you’ll be wearing them. If you’re in a cold and damp environment, a wool or alpaca blend might be your best bet for keeping warm.
However, if you’re concerned about allergies, there are many fantastic synthetic yarns available that mimic the warmth and softness of animal fibers. Acrylic and nylon blends can be excellent choices. Plus, they’re easy to clean, making your ankle warmers a practical choice for everyday wear.
The yarn weight is also crucial. Medium or aran weight yarn is a popular choice for knitted leg warmers because it strikes a balance between warmth and flexibility. It allows you to knit ankle warmers that are not too bulky but still provide the insulation you need during colder months.

Conclusions
Knitting leg warmers is a crafty and cozy way to stay warm and stylish. Whether you’re a beginner knitter or an experienced one, these versatile accessories are a fantastic addition to your wardrobe.
The right yarn choice and pattern can make your leg warmers your go-to fashion statement during chilly seasons. From pairing them with jeans for a laid-back vibe to adding a touch of elegance to your dresses and skirts, the possibilities are endless. And don’t forget to play around with colors and textures to express your unique style.
So, grab your knitting needles, your favorite yarn, and get started on your knitting leg warmers project today. Stay warm, stay stylish, and enjoy every stitch of your creative journey.
Happy knitting!
Read also: