Cable knit is one of the most classic and elegant knitting techniques. It creates a beautiful twisted texture that stands out on sweaters, scarves, and blankets. Many knitters love cable knitting because it looks complex, but it’s actually easier than it seems.
In this beginner’s guide, you’ll learn everything you need to know about cable knit. I’ll explain what it is, how it works, and how to knit a cable stitch step by step. You’ll also find helpful tips for knitting neat, even cables. By the end, you’ll have the skills to add stunning cable knit texture to any knitting project.
So, grab your yarn and needles, and let’s start learning how to knit beautiful cable knit stitches today!
This post features affiliate links. If you use these links to buy something we may earn a commission at no additional cost to you. As an Amazon Affiliate we earn from qualifying purchases.
What Is Cable Knit?
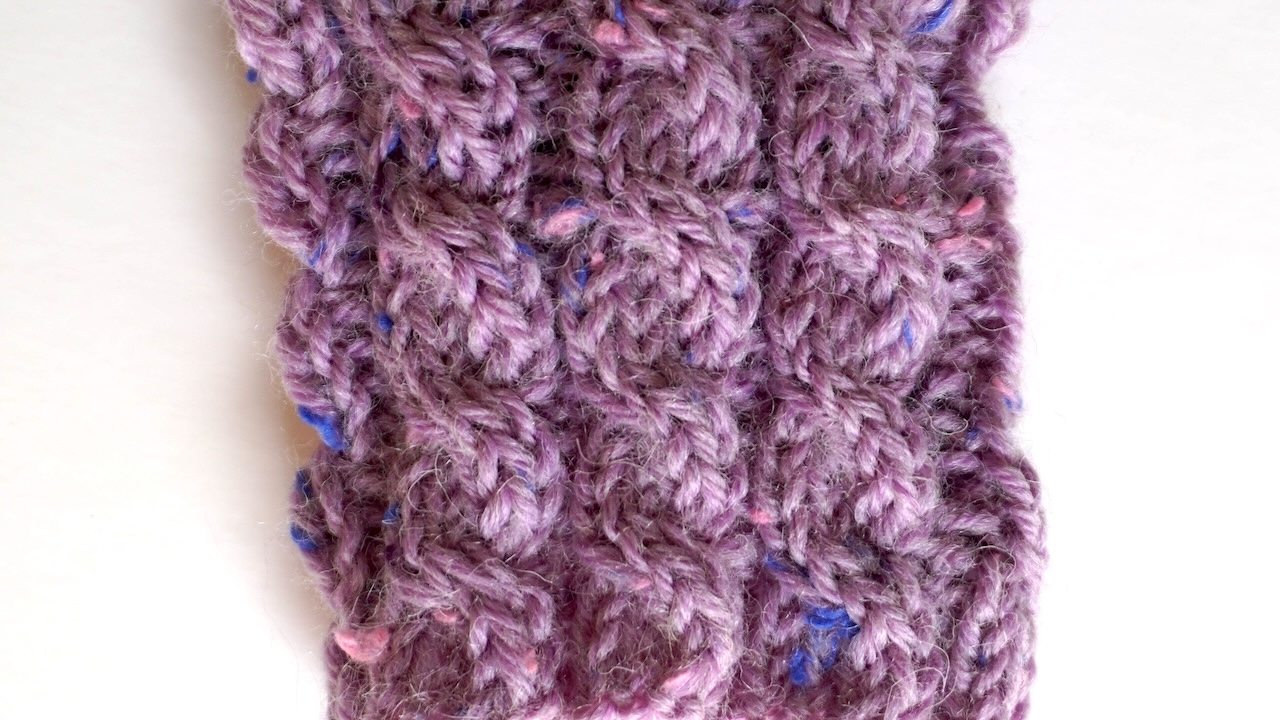
Cable knit (or rope cable) is a technique where stitches are crossed over each other to create a twist or braid. This simple movement gives your fabric a raised, three-dimensional look. You can use cable knit stitches in many ways—on cozy sweaters, hats, mittens, and even blankets.
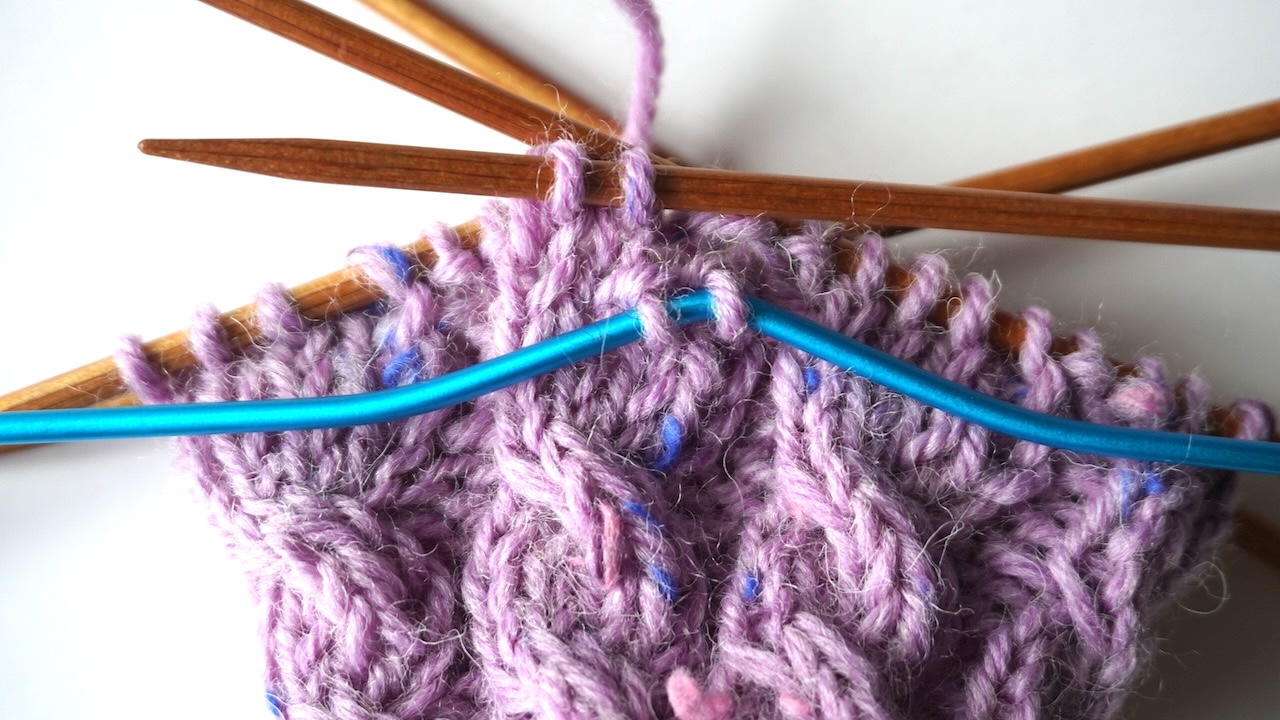
In cable knitting, you use a special tool called a cable needle. Cable needles typically are short and they have a distinctive shape, featuring a bend or a notch, which helps hold a few stitches while you knit others. By changing the order of the stitches, you create the beautiful twists that make cable knit so eye-catching.
Cable knit designs can be simple or very detailed. The basic idea is the same—crossing stitches to form textured lines or patterns. Even a beginner can make lovely results once they understand the basics.
Tools and Materials You’ll Need for Cable Knit
Before you begin, gather the right materials. Having everything ready will make your knitting smoother and more enjoyable.
You will need:
- Yarn: Choose a smooth, medium-weight yarn. Avoid fuzzy or textured yarn for your first project so you can see your cables clearly.
- Knitting needles: Use the size recommended for your yarn label. Wooden or bamboo knitting needles are always a great choice!
- Cable needle: A short, double-pointed needle used to hold stitches temporarily. You can also use a spare knitting needle or even a stitch holder if needed.
- Stitch Markers: Optional, but helpful for marking your cable sections.
- Tapestry needle: For weaving in ends once you finish.
- Scissors: For cutting the yarn.
When you have these tools, you’re ready to start knitting cable knit stitches.

Understanding Cable Knit Stitch Structure
Before diving into the step-by-step part, it helps to understand how a cable knit stitch works.
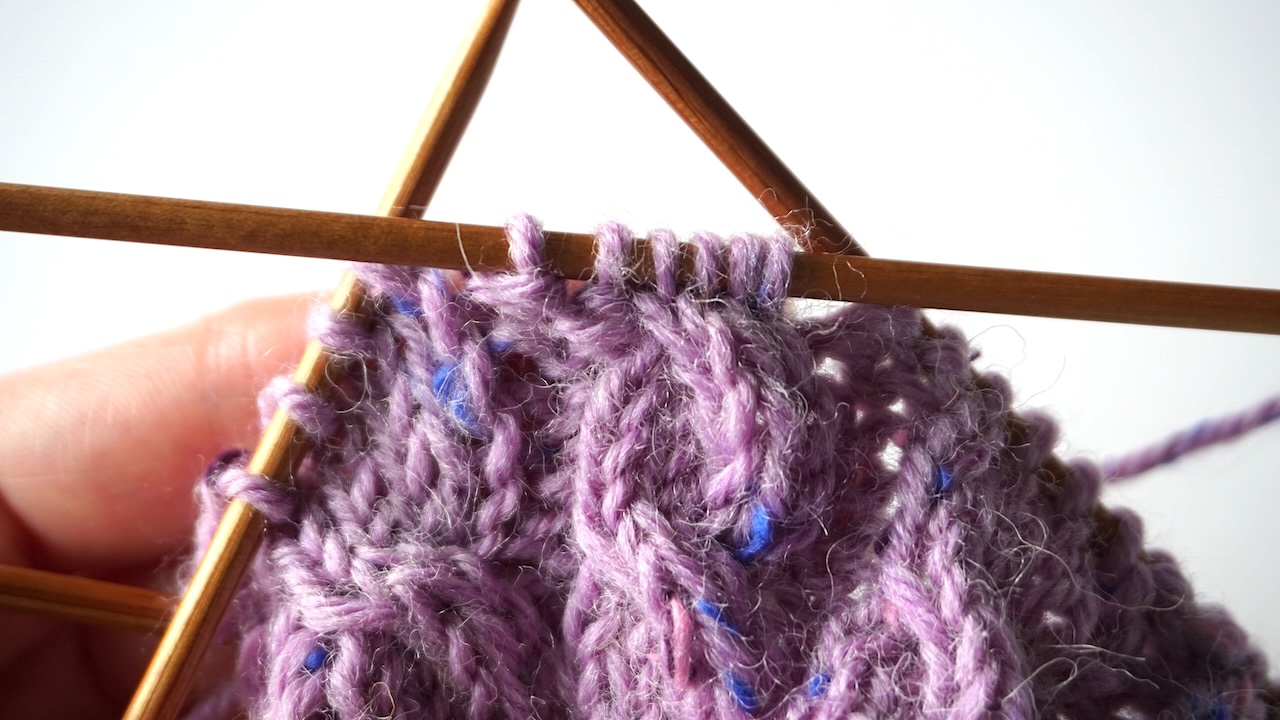
Imagine a set of vertical columns of knit stitches. In cable knitting, you make some stitches cross in front or behind others. When stitches cross to the front, the cable leans left (abbreviation C4F). When they cross behind, the cable leans right (abbreviation C4B).
Each crossing forms a “twist.” If you repeat the twist every few rows, you’ll see the familiar braided or rope-like pattern appear.
The space between cables often includes purl stitches, which make the cables stand out. In my example, you’ll use a 4-stitch cable with 2 purl stitches on each side. This creates a neat and balanced texture.
How to Knit a 4-Stitch Cable
Let’s go through the step-by-step instructions for knitting a basic 4-stitch cable knit pattern that forms a left-leaning cable (C4F). This is one of the simplest and most popular cable styles.
This pattern features two purl stitches between each cable. This creates a base of plain purl stitches that will make your cables stand out. You can experiment by decreasing or adding the numbers of the purl stitches.
Cable knit is a versatile stitch and you can work it in the round or in flat depending on your projects. The instructions are slightly different when knitting in flat but still very simple; on the wrong side, you’ll knit the stitches in reverse, i.e. purl the stitches marked as knit stitches in the pattern and vice versa. Below are the instructions for both versions.
Knitting Cable Knit in the Round
- Cast on in multiples of 6 and join in the round.
- Rounds 1 to 4: Knit 4 stitches and purl 2 stitches.
- Round 5: Move 2 stitches onto the cable needle, knit 2 stitches, knit 2 stitches from the cable needle, and purl 2 stitches. Repeat to the end of round.
- Continue repeating these five round until your work is to your desired length.


Knitting Cable Knit in Flat
- Cast on in multiples of 6.
- Rows 1 and 3 (right side): Knit 4 stitches and purl 2 stitches.
- Rows 2 and 4 (wrong side): Purl 4 stitches and knit 2 stitches.
- Row 5: Move 2 stitches onto the cable needle, knit 2 stitches, knit 2 stitches from the cable needle, and purl 2 stitches. Repeat to the end of row.
- Continue repeating these five rows until your work reaches the desired length.
Helpful Tips for Perfect Cable Knitting
Cable knitting is easy to learn, but a few small tricks can make a big difference in your results.
1. Keep Even Tension
Cables can pull your stitches tighter. Try to keep a relaxed, even tension while knitting. If your fabric looks too tight, use slightly larger needles.
2. Use Stitch Markers
Place markers before and after your cable section. This helps you keep track of where the twists begin and end, especially if your project has multiple cables.
3. Read Your Fabric
Once you understand the pattern, look at your knitting instead of only reading the chart. You’ll begin to see when a cable twist is coming up.
4. Use a Cable Needle You Like
Cable needles come in different shapes—curved, straight, or hooked. Try a few to see which one feels comfortable for you.
5. Block Your Finished Work
Blocking helps relax the stitches and makes cables stand out. Gently soak your piece in water, squeeze out excess moisture, and lay it flat to dry.
Understanding Cable Knit Charts
Many patterns use charts to show cable designs. A chart is a grid that represents stitches row by row.
In a cable knit chart:
- Each square represents one stitch.
- Symbols show whether stitches are knit, purled, or crossed.
- A slanted line often marks the cable twist direction.

Reading charts might seem confusing at first, but once you understand them, they’re easier than long written instructions.
Tip: Always read right-side rows from right to left and wrong-side rows from left to right unless your pattern says otherwise.
Variations of Cable Knit Patterns
Once you master the basic 4-stitch cable, you can try more complex versions. Each variation changes how your cables look and feel. Here are listed a few common cables you can try.
1. 6-Stitch Cable
This cable uses six knit stitches instead of four. It creates a wider, bolder twist that’s perfect for a chunky cable knit cardigan or cable knit blanket.
2. Horseshoe Cable
which is also known as Double Cable or Wishbone Cable
The horseshoe cable, which is also known as double cable or wishbone cable, forms a lovely oval or arch shape that looks like a horseshoe. It’s made by combining two cables that lean toward each other, creating a rounded design. It looks intricate but is actually easy to knit.

3. Braid Cables
Braid cables look like classic woven braids made from several columns of stitches. The strands cross over and under each other, creating an intricate, textured design that makes a stunning focal point on sweaters.
4. Honeycomb Cables
Honeycomb cables create a textured pattern that resembles a honeycomb. They form by alternating left and right twists across the fabric. The result is a stretchy, raised design that adds warmth and visual interest.
Cable knitting has endless design possibilities. Once you know how to knit a cable stitch, you can mix and match different types for creative effects. For example, try combining cables with mock cables.
Common Mistakes in Cable Knitting and How to Fix Them
Even experienced knitters make small mistakes when working with cables. The good news is that most errors are easy to fix once you understand what happened.
Here are a few common cable knitting mistakes and how to correct them.
Mistake 1: Twisting in the Wrong Direction
Sometimes cables lean the wrong way when you hold stitches on the wrong side of your work. This is an easy mix-up, especially when you’re learning.
To fix it, check your pattern to see if the stitches should cross in front or behind. If you notice the mistake early, you can carefully drop just those stitches and rework the twist with a crochet hook.
If the error is several rows back, it’s usually best to unravel a few rows and knit again. With practice, you’ll soon recognize the difference between left and right twists at a glance.
Mistake 2: Forgetting to Cross
It’s easy to forget to make a cable cross, especially when knitting while watching TV or chatting. When this happens, your cable section will look flat for a few rows.
You can fix it by laddering down to the missed row and reworking the twist using a small crochet hook. Another option is to leave it as is—sometimes a missed cross adds a unique handmade charm. But if you prefer a perfect look, it’s worth taking a few minutes to fix it right away.
Mistake 3: Tight Stitches
Cables naturally pull your stitches tighter because of the crossing motion. This can make your fabric stiff or uneven.
To fix this, keep a relaxed grip on your yarn and avoid pulling too tightly after making a cross. You can also use a needle one size larger to loosen the tension slightly. If your cables still look tight, try adding one or two purl stitches between sections to give them more room to stretch.
With a little patience and practice, these small mistakes will become less common. Every project helps you build confidence and control, and before long, your cable knit work will look smooth, even, and professional.
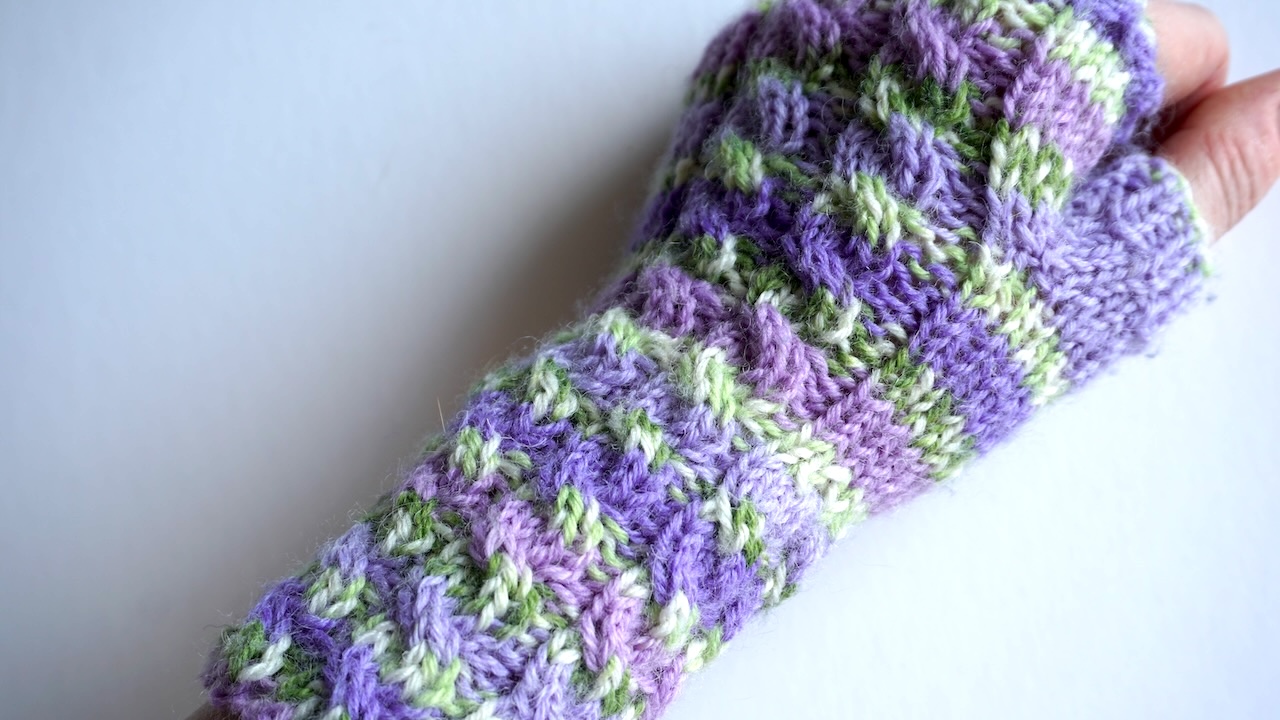
Projects You Can Make with Cable Knit
Cable knit is a timeless design that works well for many projects. Once you know the basic 4-stitch cable pattern, you can use it in different ways:
- Scarves: A simple cable scarf looks elegant and makes a perfect gift.
- Hats: Add a single cable or a set of cables around the hat for texture.
- Sweaters: Cable knit cardigans are classic winter favorites.
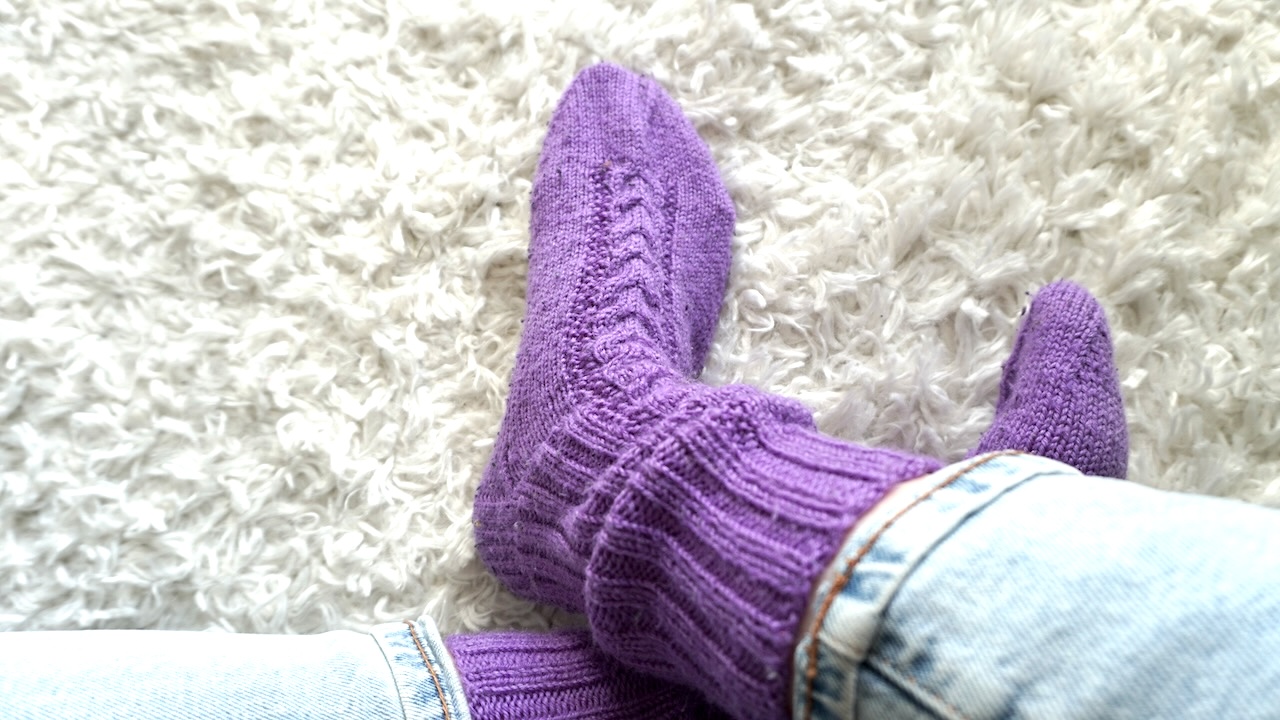
- Blankets: Large cables create cozy, warm cable knit throw blankets that showcase your knitting skill.
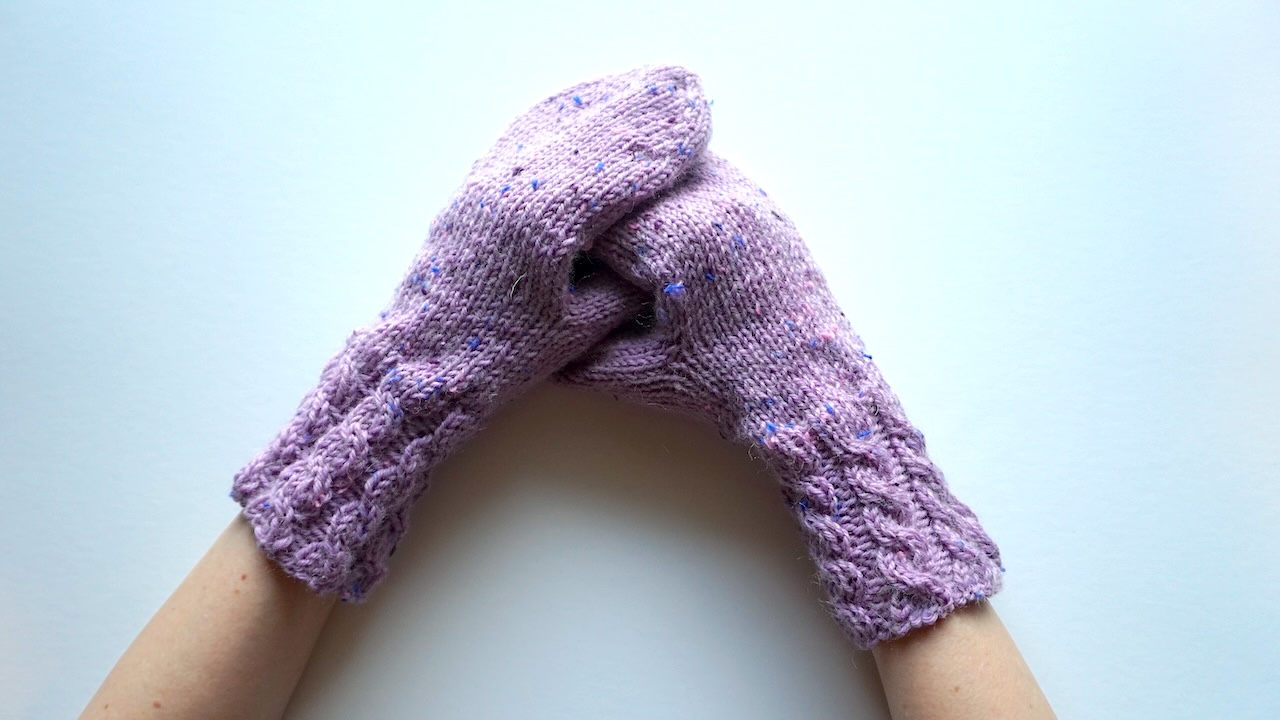
The beauty of cable knitting is that it never goes out of style. You can start by practicing with this knitting mittens pattern that features a cable cuff.
Remember to take gentle care of you cable knit items to keep their shape and texture. Hand washing you cable knit garments (always check your yarn label for washing instructions), avoiding wringing the fabric, laying flat to dry and storing them folded will keep your cable knit projects beautiful for years.
Final Thoughts on Cable Knitting
Cable knitting may look complex, but once you understand the basics, it’s truly enjoyable. The twisting stitches create a rich texture that adds warmth and style to any piece.
Start small—with a 4-stitch cable and a few purl stitches between. With practice, you’ll gain confidence and soon move on to more detailed patterns.
So grab your yarn and needles, and try your first cable knit today. Once you see those beautiful twists forming, you’ll be hooked on the magic of cable knitting!
Happy knitting!
Next stitches to learn: