Colorwork knitting is one of the most beautiful ways to add personality to your projects. It lets you create patterns, shapes, and even pictures using different colors of yarn. Though it may look advanced, colorwork knitting can be simple once you understand the basics.
In this guide, I’ll explore everything you need to know about colorwork knitting. You’ll learn about different techniques, how to read colorwork knitting charts, and how to fix common colorwork problems.
By the end, you’ll be ready to start your first stranded colorwork project with confidence.
Let’s dive in!
What Is Colorwork Knitting?
Colorwork knitting is a way of using two or more colors in the same row or round. It helps you create designs such as stripes, geometric shapes, flowers, or traditional motifs.
Unlike simple stripes, colorwork involves switching between colors within a single row. The result is a fabric filled with patterns that look complex but are easy once you learn the method.
Many knitters love colorwork because it adds personality and depth to their pieces. You can use colorwork in scarves, hats, socks, and sweaters.
There are many styles of colorwork. The most common are stranded colorwork, intarsia, and slip-stitch colorwork. Each uses a slightly different technique to add color.
Let’s take a closer look at each one.
1. Stranded Colorwork
Stranded colorwork is the most popular type. In this method, you carry two or more colors along a row. You knit stitches with one color while the other yarn floats behind your work.
This technique is often used in traditional designs like Fair Isle or Nordic knitting.
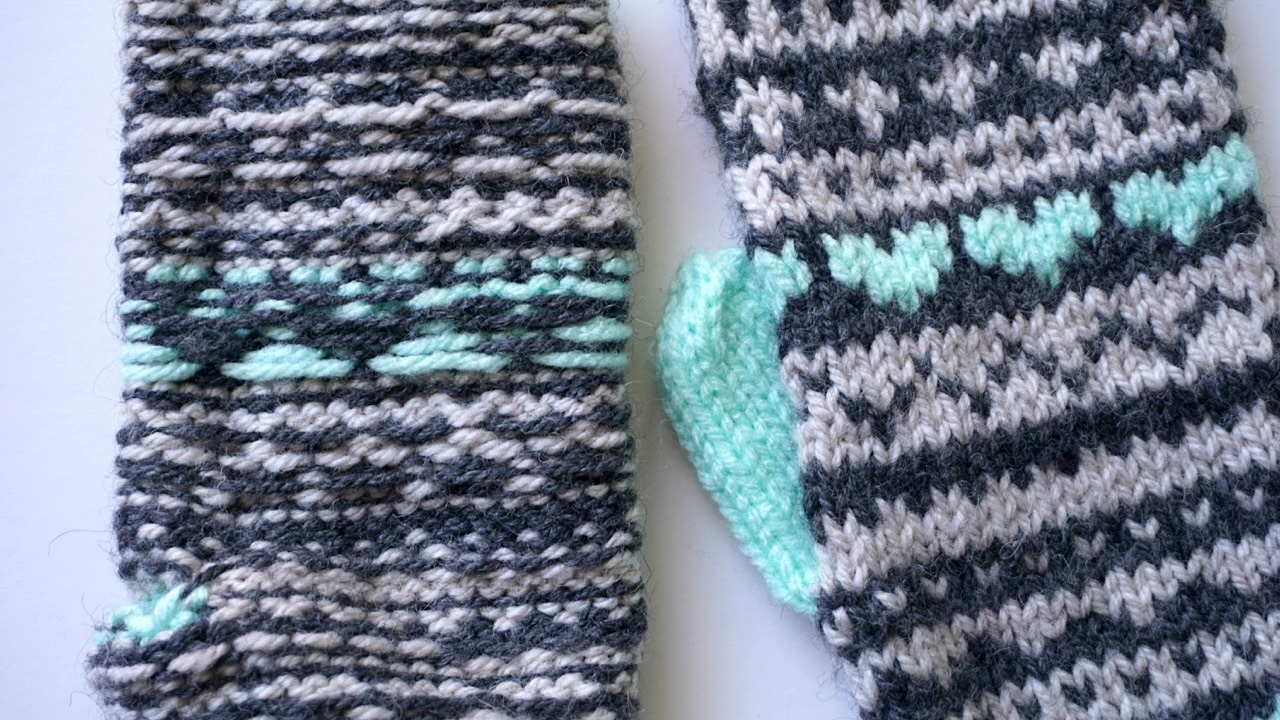
For example, when you knit with red and white yarn, you’ll hold both yarns and switch between them as you follow a chart. The unused color forms small floats on the wrong side of your work.
To keep your knitting even, try not to pull the floats too tight. Loose and even tension gives you a smooth fabric.
This technique is great for traditional patterns like snowflakes and geometric shapes.
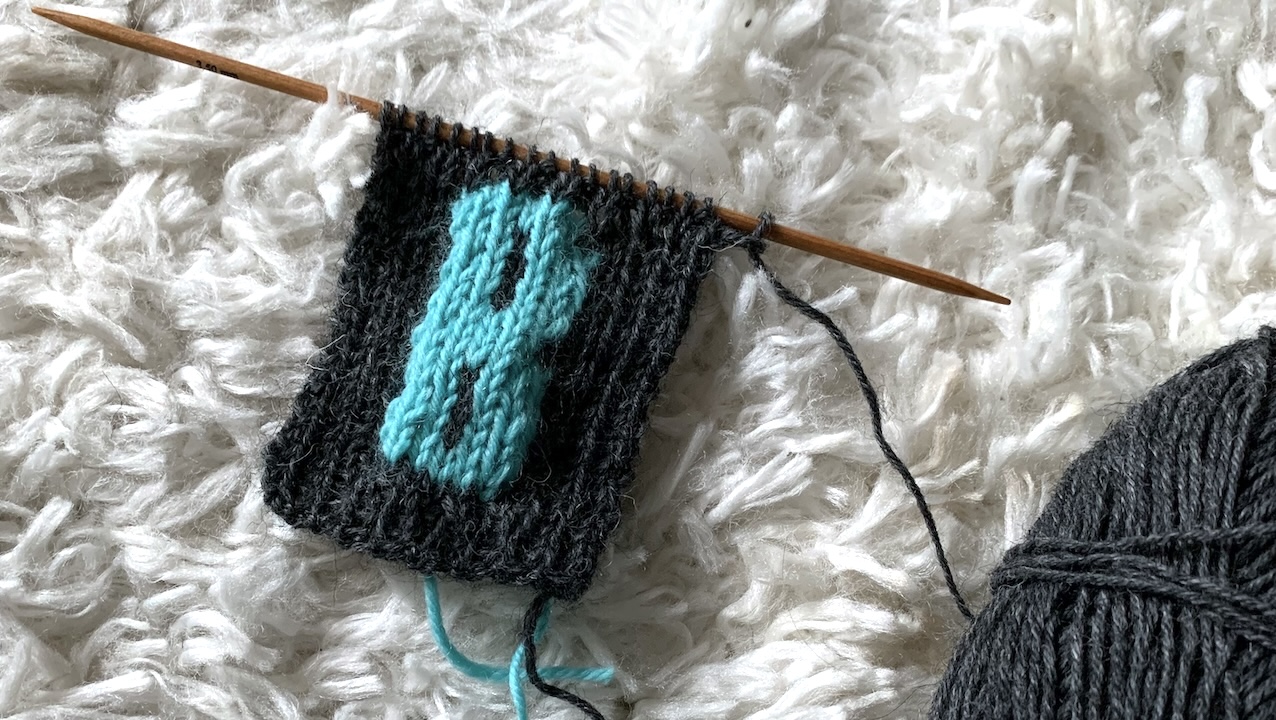
2. Intarsia Colorwork
Intarsia uses separate yarn blocks for each color section. It’s perfect for large designs, such as pictures or shapes, where each color area is separate. Unlike stranded colorwork, you don’t carry yarn across the back.
Instead, you use a separate small ball or bobbin of yarn for each color area. When you change colors, you twist the yarns together to avoid holes.
Intarsia is basically good at what stranded knitting isn’t. It’s easy to work flat and great for big motifs. This method is perfect for adding a big heart, flower, or letter to a sweater or blanket.
3. Slip-Stitch (Mosaic) Colorwork
Slip-stitch colorwork, also called mosaic knitting, is the easiest to start with. You work with only one color per row and slip stitches from the previous row to bring in the second color.
It creates a fun textured pattern with very little effort. Because you don’t have to hold two yarns at once, it’s great for beginners.
Stranded Colorwork vs. Fair Isle Knitting
Many knitters use the terms stranded colorwork and Fair Isle knitting interchangeably, but they’re not exactly the same. Both techniques involve working with two or more colors in the same row. However, there are key differences in their history, rules, and style.
1. Technique
In stranded colorwork, you carry multiple strands of yarn across the back of the fabric. You can use as many colors as you like in one project. Fair Isle knitting, on the other hand, traditionally limits you to two colors per row. This keeps the floats shorter and the fabric more even.
2. Origin
Fair Isle knitting comes from Fair Isle, a small island in Scotland’s Shetland Islands. The technique developed hundreds of years ago and became famous for its distinctive geometric motifs. Stranded colorwork is a broader term that covers many regional knitting styles, including Norwegian, Icelandic, and Baltic designs.
3. Patterns and Motifs
Fair Isle designs often feature small repeating motifs in bands across the fabric. They use symmetrical patterns and limited palettes of natural or muted tones. Stranded colorwork includes a wider range of motifs and colors, from traditional to modern designs.
4. Yarn Management
Because Fair Isle uses two colors per row, yarn management is simpler. Stranded colorwork may use more than two colors, which means you’ll need to handle multiple strands carefully to avoid tangling. Managing tension is key in both techniques to prevent puckering.
5. Modern Use
Today, many knitters blend both styles. You might find patterns that use Fair Isle motifs but add more colors or modern twists. Understanding the difference helps you choose the right method for your project and style.
In short, all Fair Isle knitting is stranded colorwork, but not all stranded colorwork is Fair Isle. Knowing the difference will help you appreciate the beauty and tradition behind each style.

Getting Started with Colorwork Knitting
Before starting your first colorwork project, gather the right materials and tools. The right setup makes colorwork much easier and more enjoyable.
1. Choose the Right Yarn
Yarn choice can make or break a colorwork project. Choose smooth, non-slippery yarns made of wool or wool blends. They grip each other well and hide small mistakes.
Avoid cotton or silk for your first project since they can be slippery.
Choose colors with strong contrast. For example, light blue and navy will stand out more than two similar shades. If you’re unsure, take a photo and turn it black and white. The greater the contrast, the better the pattern will show.
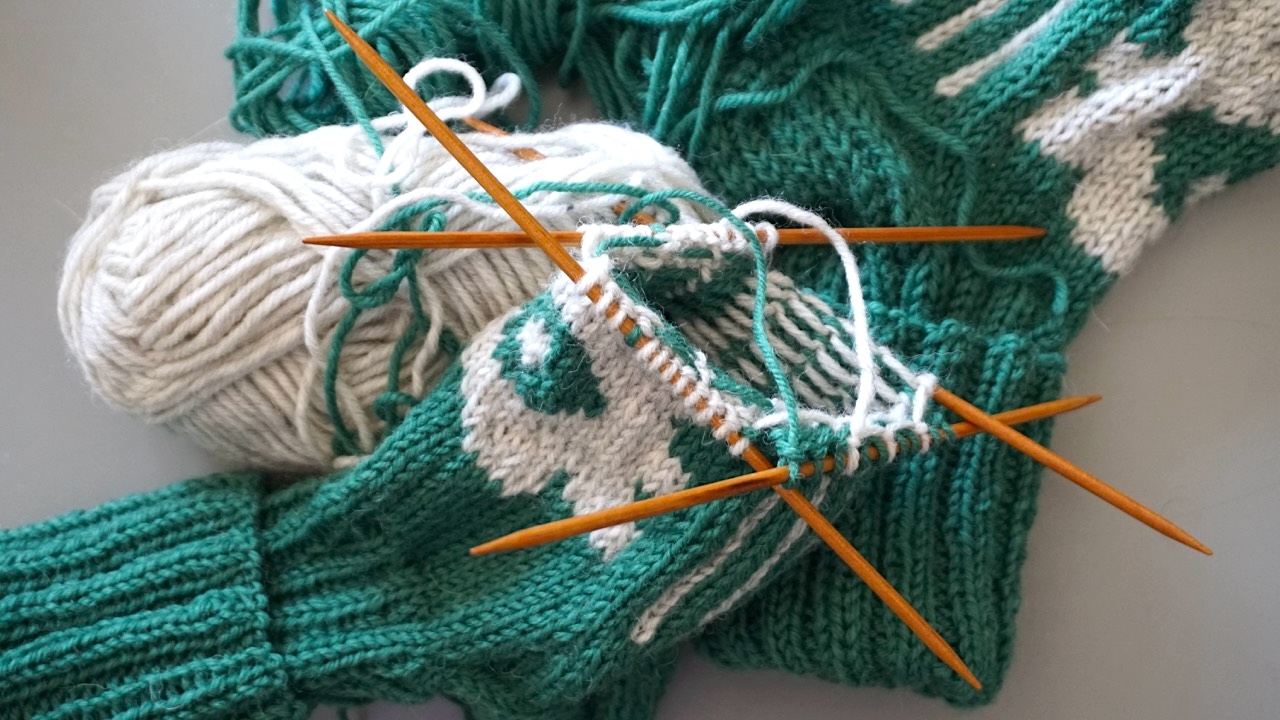
2. Use Circular or Double-Pointed Needles
When you knit stranded colorwork, you often work in the round. Circular needles or double-pointed needles are perfect for this.
Knitting in the round means the right side always faces you. It also helps keep your tension even since you’re knitting every stitch instead of purling.
If you’re making a flat project, straight needles work too. Just remember to read colorwork charts from right to left on right-side rows and left to right on wrong-side rows.
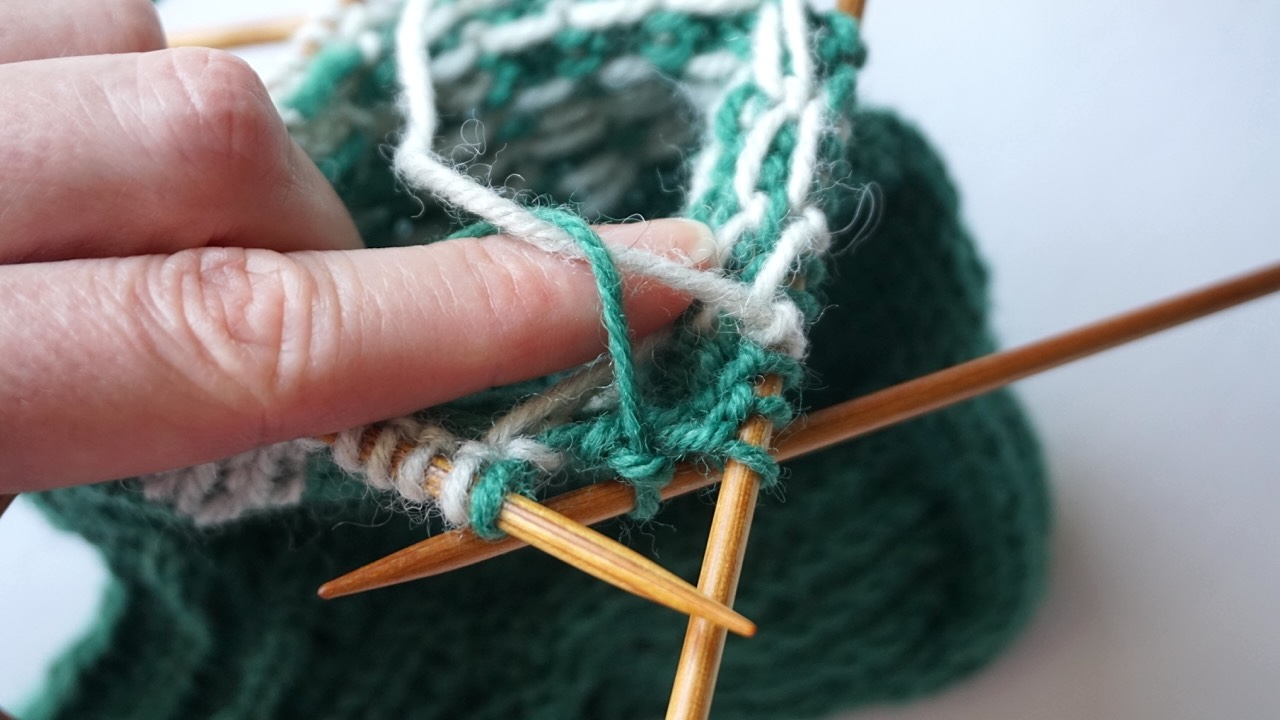
3. Learn How to Hold Two Colors
For stranded colorwork, hold your main color as usual with your left hand and drape the second color alongside it.
Switch between colors by picking the yarn you need for each stitch. Keep the unused color loose behind your work to form smooth floats. Avoid pulling it too tight to prevent puckering. Short floats (no more than 5 stitches) help maintain even tension.
Practice moving the yarn between fingers to find a comfortable way to control both colors. With time, switching colors in continental style becomes quick and natural.
How to Read Colorwork Knitting Charts
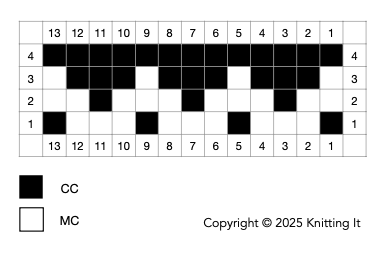
Most colorwork knitting patterns come with a chart instead of written instructions. A colorwork chart is a grid of squares, each representing a stitch and a color.
The chart shows how the design should look on the right side of your work.
1. Understanding the Chart Layout
Each square in the chart equals one stitch. The symbols or colors show which yarn to use for that stitch.
If you’re knitting in the round, read every row from right to left since you’re always looking at the right side.
If you’re knitting flat, you read odd rows from right to left and even rows from left to right.
2. Using Chart Key and Symbols
Every chart comes with a key that explains the symbols or colors. Always check it before you start.
For instance, white squares might mean Main Color (MC), or Color A, and blue squares mean Contrast Color (CC), or Color B.
Keep the chart near your work, and mark off each row as you complete it. This helps you track your progress and avoid mistakes.
3. Tips for Easier Chart Reading
- Use a magnetic board or sticky notes to keep your place.
- Start with small charts before moving to complex ones.
- Count stitches often to ensure you stay in pattern.
- Remember that colorwork charts show the front side of your work.
How to Knit Stranded Colorwork Step by Step
Here’s a simple step-by-step guide to knitting stranded colorwork.
Follow these easy instructions to understand the technique better.
Step 1: Cast On and Knit a Border
Start with a stretchy cast-on and knit a few rows of ribbing. This keeps the fabric from curling.
You can use a solid color for the border before switching to your colorwork pattern.
Step 2: Prepare the Yarns
Choose two contrasting colors, such as light gray and dark blue. Hold the main color in your left hand and drape the second color alongside.
Make sure the yarns are not twisted before you start.
Step 3: Follow the Chart
Begin knitting the first row of your colorwork knitting chart. Each time you see a new color on the chart, switch yarns.
When you’re not using one color, let it float loosely behind your work. Don’t pull it tight.
Keep your floats no longer than five stitches so that they don’t catch on fingers, jewelry, toes, or other things that can work their way between the knitted fabric and the float. If you need to carry a float farther, catch it gently by twisting the yarns on the back.
Tip! Always remember to tighten the stitch that you caught the float with. A common mistake is to make the stitch loose and then the color of the float yarn will show through, making the pattern not look uniform.
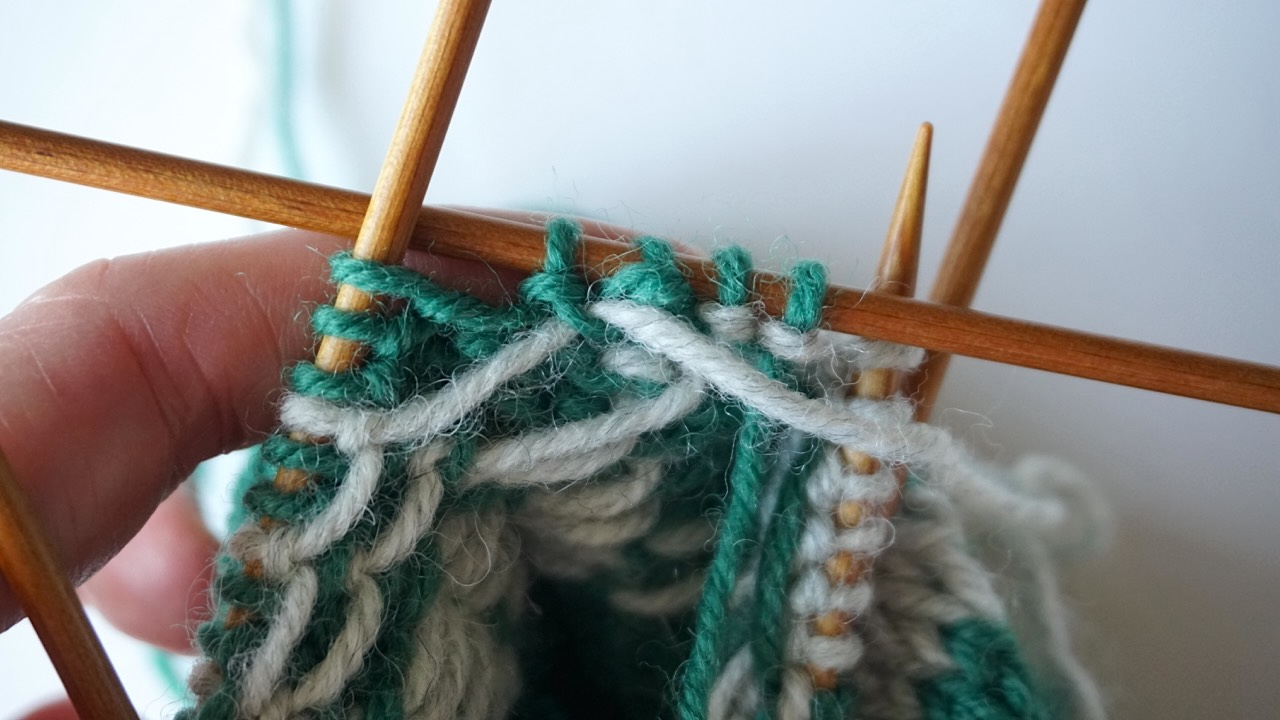
Step 4: Manage the Floats
Even tension is key to good stranded colorwork. Check the back of your fabric often to make sure the floats aren’t tight or sagging.
Loose floats can snag, while tight ones can make your fabric pucker.
Try spreading out the stitches on your right needle after each color change. This keeps the floats even.
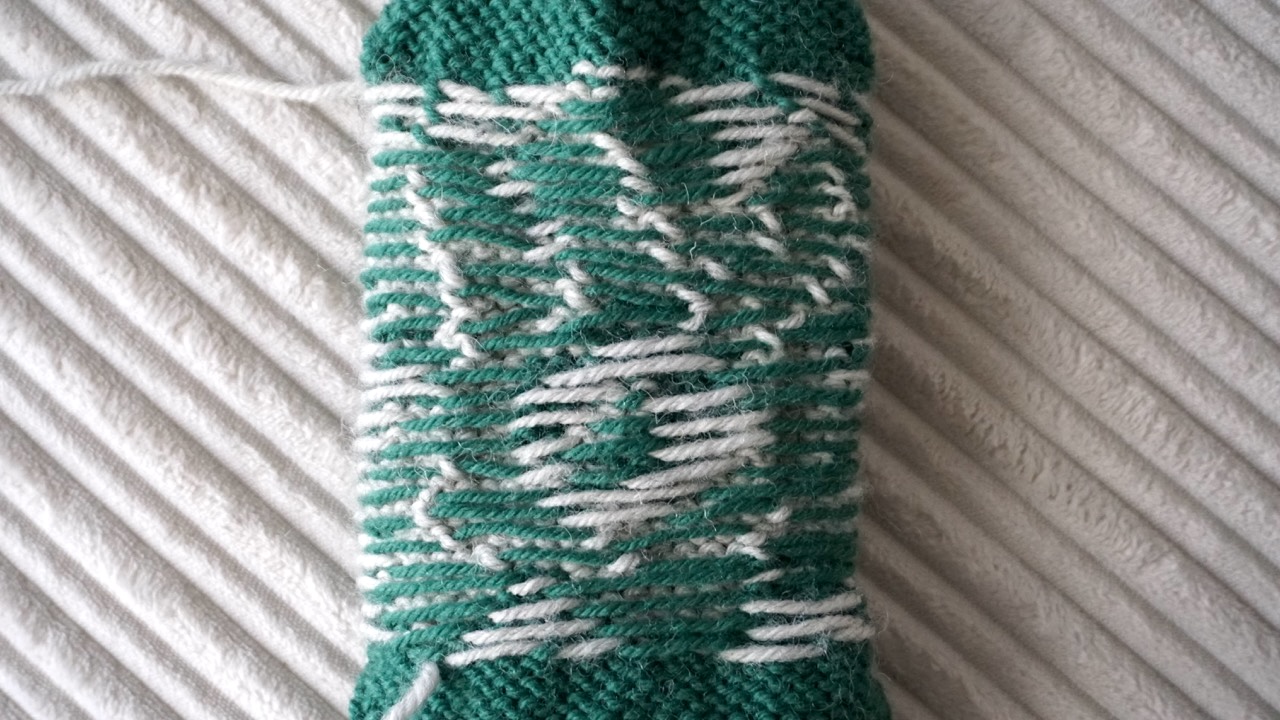
Step 5: Finishing the Colorwork Section
Once you finish the chart, continue with your main color or switch to a simple pattern. Knit a few rounds of ribbing before binding off.
Then, weave in your ends carefully on the wrong side.
Block your project gently to smooth the fabric and even out the stitches.
Colorwork Knitting Patterns for Beginners
When you’re new to colorwork knitting, it’s best to start small. Choose patterns that use only two colors and simple motifs.
Here are some beginner-friendly ideas:
1. Colorwork Hats
Hats are perfect for trying stranded colorwork. They’re small, quick to finish, and you can easily see your progress.
Try a simple snowflake or diamond pattern. Many colorwork knitting charts for hats are free and easy to follow.
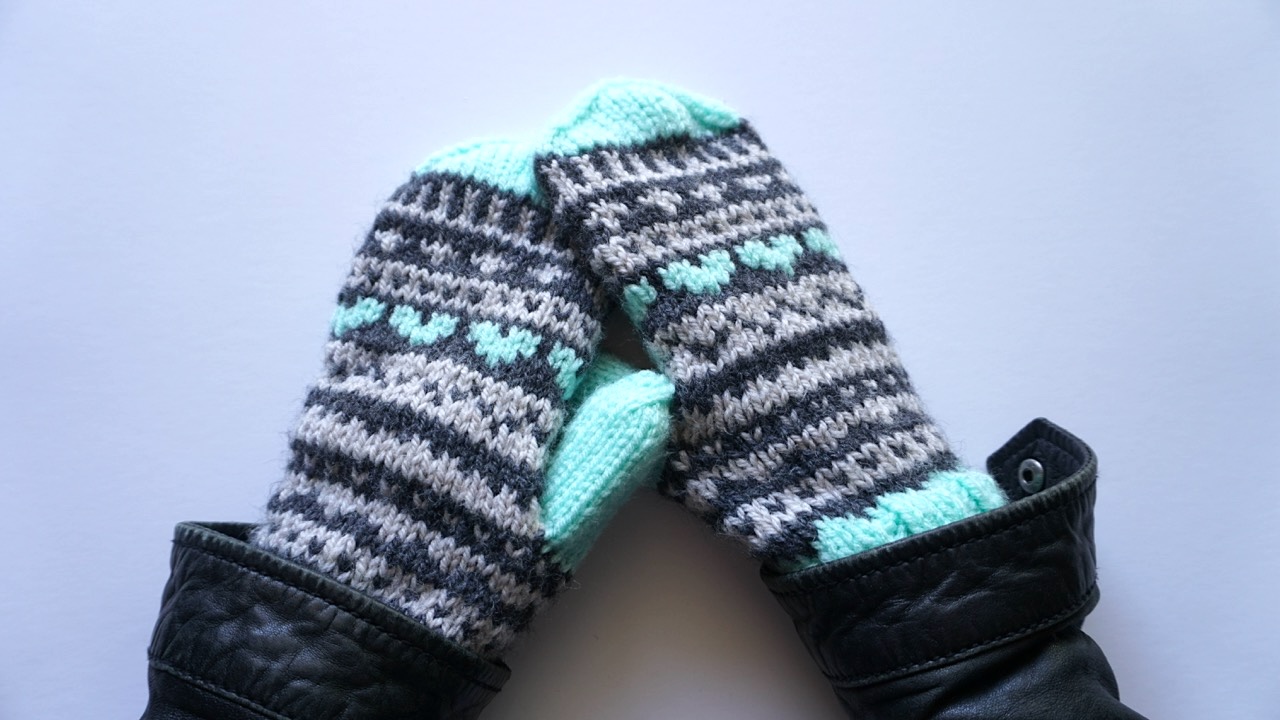
2. Colorwork Mittens
Mittens are another great project. You’ll practice knitting in the round and switching colors at the same time.
Choose a pattern with small, repeating motifs for a clean look.
3. Colorwork Cowls or Neck Warmers
Cowls let you practice knitting colorwork in the round without shaping. You can experiment with different colors and patterns.
A simple two-color design looks elegant and keeps you warm.
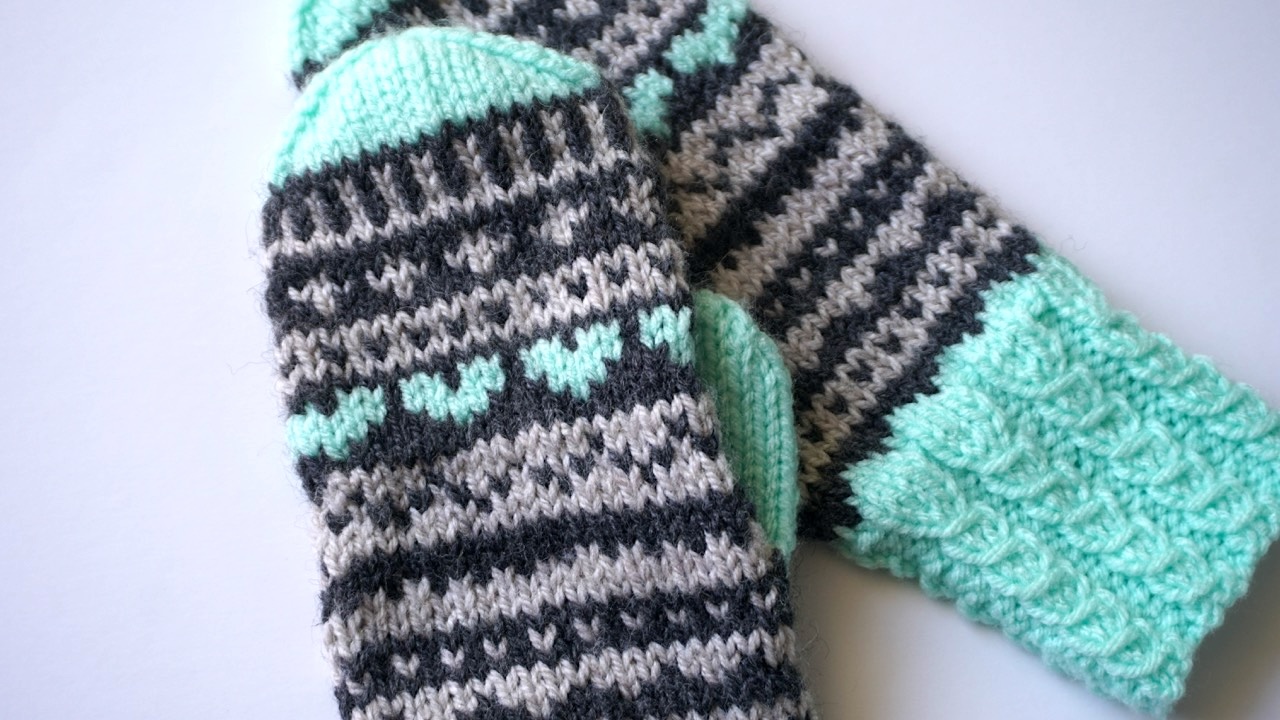
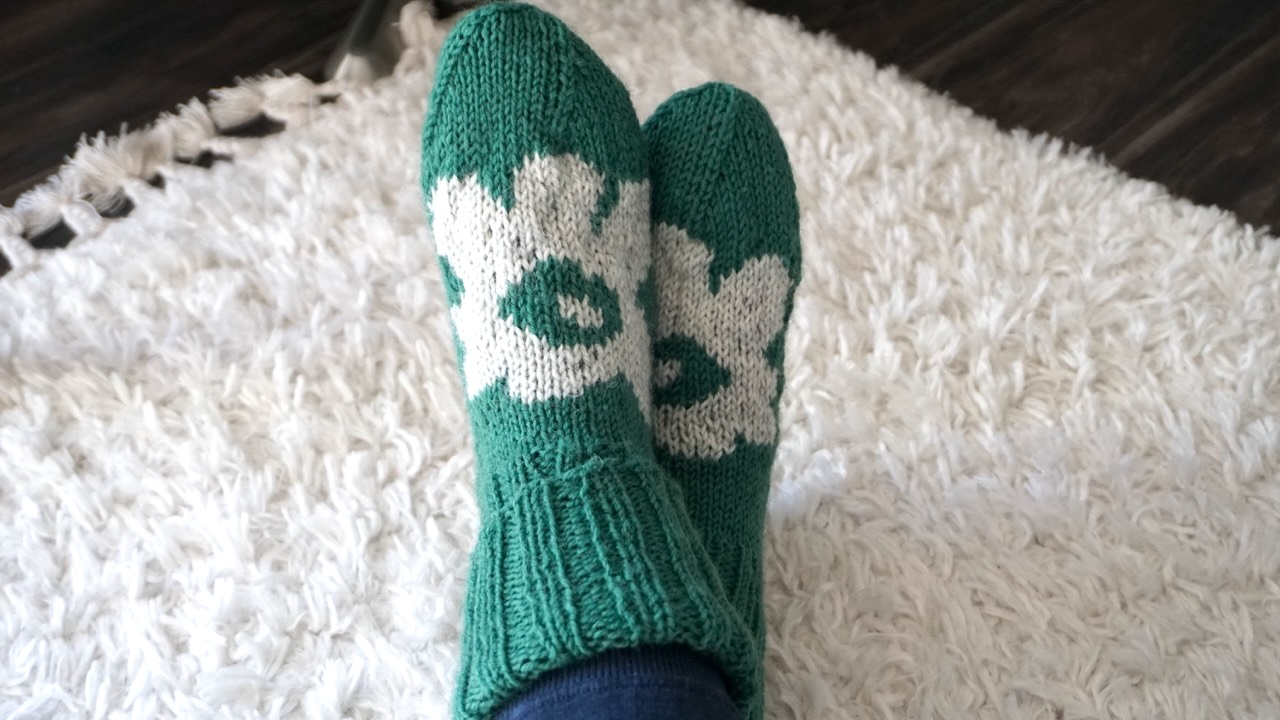
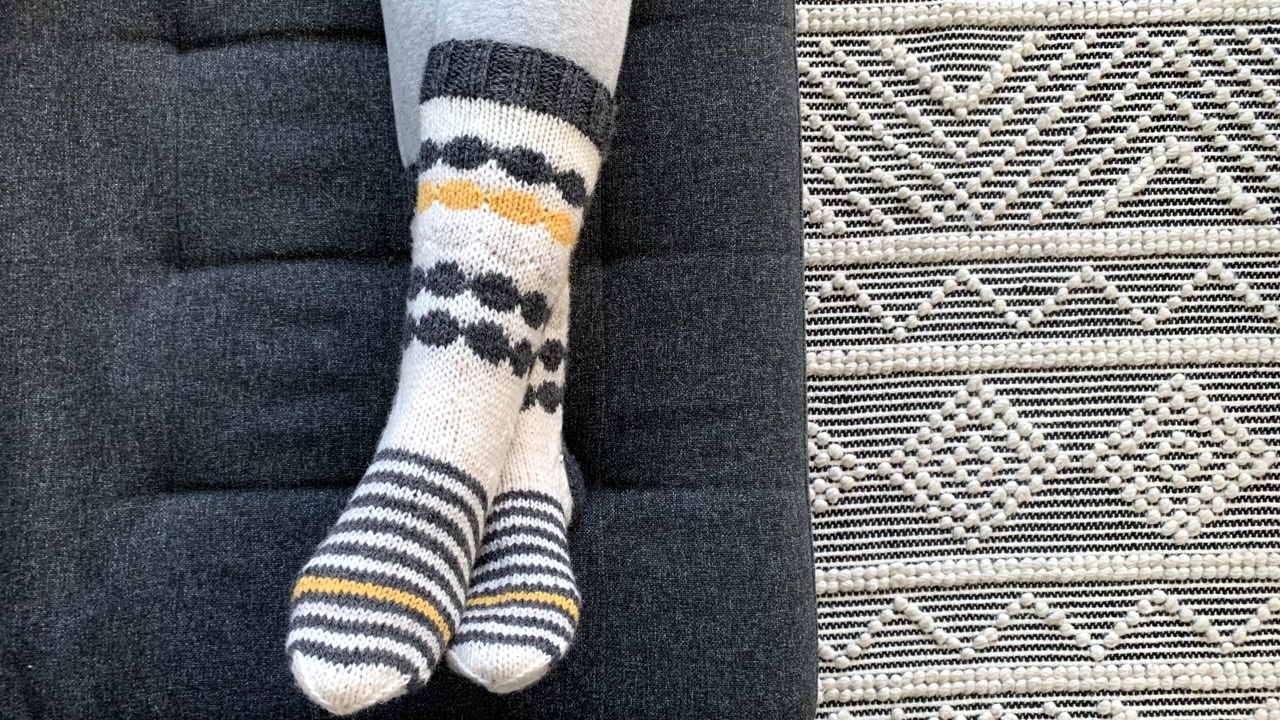
4. Colorwork Socks
If you enjoy sock knitting, try adding a small colorwork design on the cuff or top of the foot.
Check out this step-by-step guide to knitting colorwork socks. This simple flower pattern inspired by the iconic Marimekko’s Unikko design combines beauty, structure, and creativity.
Troubleshooting Common Colorwork Problems
Even experienced knitters face issues with colorwork knitting. Let’s go over a few common problems and how to fix them.
1. Uneven Tension
If your fabric puckers, your floats are too tight. Relax your hands and spread the stitches along the needle.
If your floats sag, try holding the yarns closer to the needle for better control.
2. Twisted Yarns
If your yarns tangle, make sure you’re always holding them in the same position. For example, keep Color A on top and Color B on bottom.
Untwist them every few rows to avoid knots.
3. Colors Don’t Stand Out
Low contrast can make patterns hard to see. Choose colors that differ in both hue and brightness.
Try pairing a light color with a dark one for a clear design.
Finishing and Blocking Colorwork Knits
Blocking is the final step to make your colorwork knitting look neat and professional.
Soak your finished project in lukewarm water with a mild wool wash. Gently press out the water and lay it flat to dry.
This step smooths out stitches, evens tension, and makes your colors shine. You can check the detailed instructions with images for how to block knitting here.
Final Tips for Successful Colorwork Knitting
Here are a few quick tips to make your colorwork journey easier:
- Start with simple two-color designs.
- Practice switching between the yarns.
- Keep floats short and even.
- Choose high-contrast colors.
- Use charts and mark your progress.
- Block your finished piece for a polished look.
Conclusion
Colorwork knitting adds beauty and creativity to your handmade projects. Whether you love traditional stranded colorwork or want to design your own colorwork knitting patterns, the possibilities are endless.
With the right yarn, chart, and a bit of practice, you’ll soon be knitting colorful designs that look amazing.
So grab your yarn, pick your favorite colorwork knitting chart, and start your next project today. You’ll be surprised how easy and fun knitting colorwork can be!
Happy knitting!
Read also:
- Knitting Colorwork Socks: Unikko Knitting Pattern
- The Knitter’s Guide to Essential Knitting Terms
- Knitting with Four Double Pointed Needles: A Beginner’s Complete Guide
- Knitting With Circular Needles: The Simple Guide for Beginners
- Joining in the Round in Knitting: Easy Instructions
- How To Bind Off in the Round
- Complete Yarn Substitution Guide